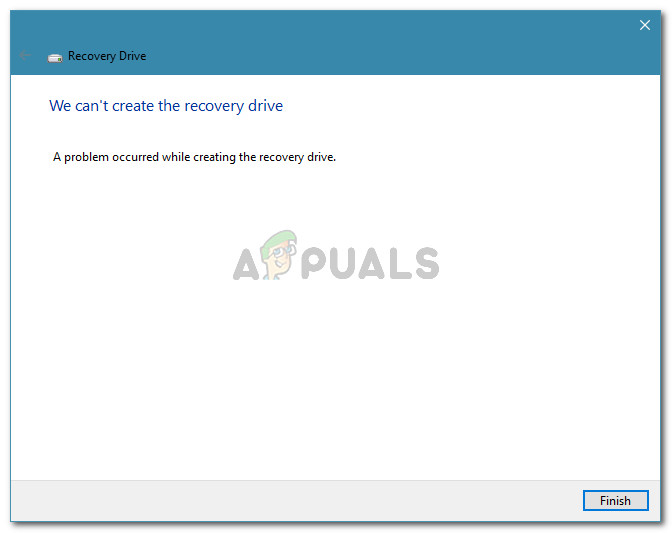
What is causing the “A problem occurred while creating the recovery drive” error?
We have investigated this particular issue by looking at various user reports. From what we gathered, there are several fairly common scenarios that will trigger this particular error message: If you’re struggling to resolve this particular issue, this article will provide you with a list of verified troubleshooting steps. Down below, you’ll find a selection of methods that other users in a similar situation have used to get the issue resolved. For the best results, follow the repair strategies in the order that they are presented until you find a fix that manages to resolve the error in your situation.
Method 1: Formatting the flash drive
Some users encountering the “A problem occurred while creating the recovery drive” error have managed to get the issue resolved by doing a Full format on the USB stick before running RecoveryDrive.exe. As it turns out, only a Full format is confirmed to resolve the issue as a lot of users have reported that a Fast (Quick) didn’t make any difference. Here’s a quick guide on Full-formatting your flash drive: If this method wasn’t helpful in your particular scenario, move down to the next method below.
Method 2: Disable 3 services related to Microsoft Office
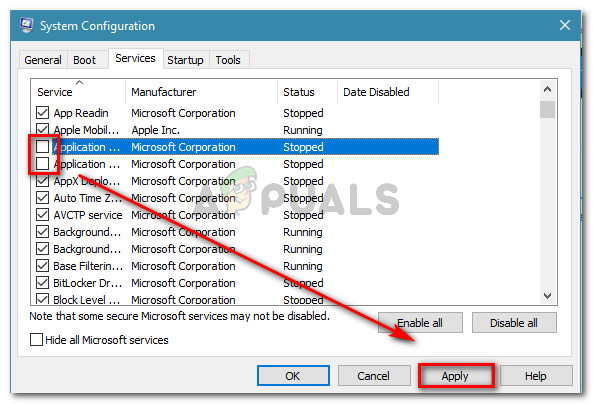
Other users have managed to resolve the issue by disabling a series of services related to Microsoft Word and Microsoft Excel. Although there’s no official explanation why this fix is effective, users speculate that it probably has something to do with an interference between the Application Virtualization process and Volume Shadow Copies. Here are the processes that might be involved in the alleged interference:
Client Virtualization Handler (cvhsvc)Application Virtualization Service Agent (sftvsa)Application Virtualization Client (sftlist)
Some users encountering the same problem have managed to get the issue resolved by using the System Configuration screen to prevent these 3 processes from being started at the next system startup. Here’s a quick guide on how to do this: If this method was not effective, move down to the next method below.
Method 3: Using the two-step trick
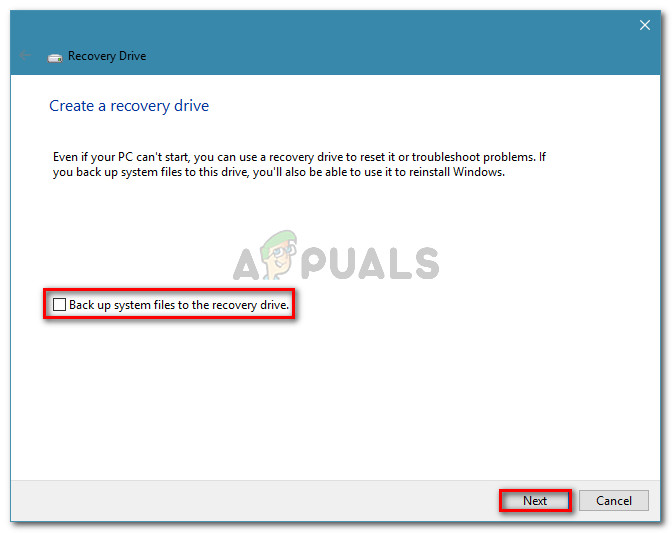
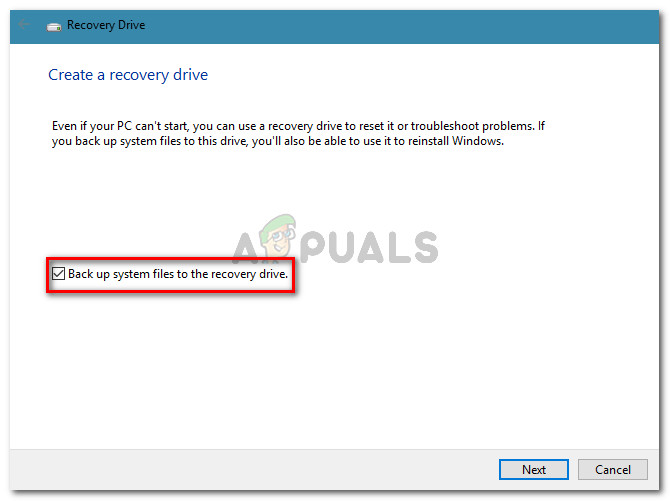
This might seem like a weird trick, but a lot of users have managed to complete the creation of the recovery drive by running the RecoveryDrive.exe utility in two steps without exiting the program. There’s no explanation why this works, but users speculate that this probably gets around a Microsoft glitch that was left unaddressed for a couple of years (the issue is also reported to occur on Windows 8 and Windows 7. To use the two-step recovery trick, you’ll need to get to the end of the Recovery Drive wizard (with the Backup system files to the recovery drive box unchecked) without clicking Finish. Instead, you’ll use Alt + B to get back to the first page to the original screen and then repeat the process with the Back up system files to the recovery drive box checked. Here’s a step by step guide on how to do this:
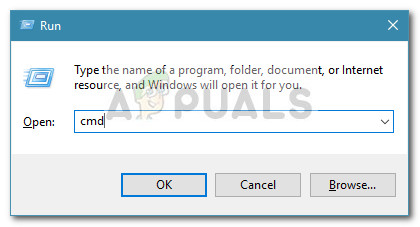
Method 4: Performing an SFC scan
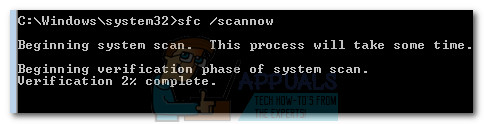
Some users have reported that the issue was resolved entirely after they ran an SFC scan on their machine. For them, the Recovery Drive started functioning normally after a reboot. An SFC (System File Checker) scan will investigate the system files for any corruption and replace any identified corrupted occurrences with locally stored healthy copies. This process can take quite a lot of time (depending on your disk size), so make sure you have time for it. Follow the steps below to perform an SFC scan on your machine: If the “A problem occurred while creating the recovery drive” error is still occuring, move down to the next method below.
Method 5: Performing a clean install or repair install
If you’ve come this far without a result, it’s very likely that your system is suffering from some underlying corruption problem that ended up breaking the Recovery Media Creator tool. Several users in a similar situation have reported that the method was only resolved after they performed a clean install. If you want to go this route, you can follow our step-by-step article (here). But there is an even better option that will allow you to reinstall all Windows components without the need to delete your personal files. A repair install will allow you to preserve all your personal files (including images, applications, and user settings) – only the Windows components will be reinstalled. You can perform a repair install by following this guide (here). Note: if all the options have failed for you, it is strongly recommended to use a bigger flash drive than the one that is being recommended by the computer. One user used a 32GB drive when the system was recommending 16GB and the issue was fixed for them.
Fatal Error Occurred while Creating an SSL Client Credential in Event ViewerFix: Google Drive Error Creating CopyFix: “something went wrong” while creating account on Windows 10Fix: We Can’t Create a Recovery Drive on this PC