After investigating this particular issue thoroughly, it turns out that there are several different common culprits that are known to cause this particular behavior on Windows 10. Here’s a list of the most common occurrences: Now that you know every potential culprit that might be responsible for this issue, here’s a list of confirmed fixes that other affected users have successfully used to get rid of the issue and complete the bandwidth test inside uTorrent:
Method 1: Performing a Winsock Reset
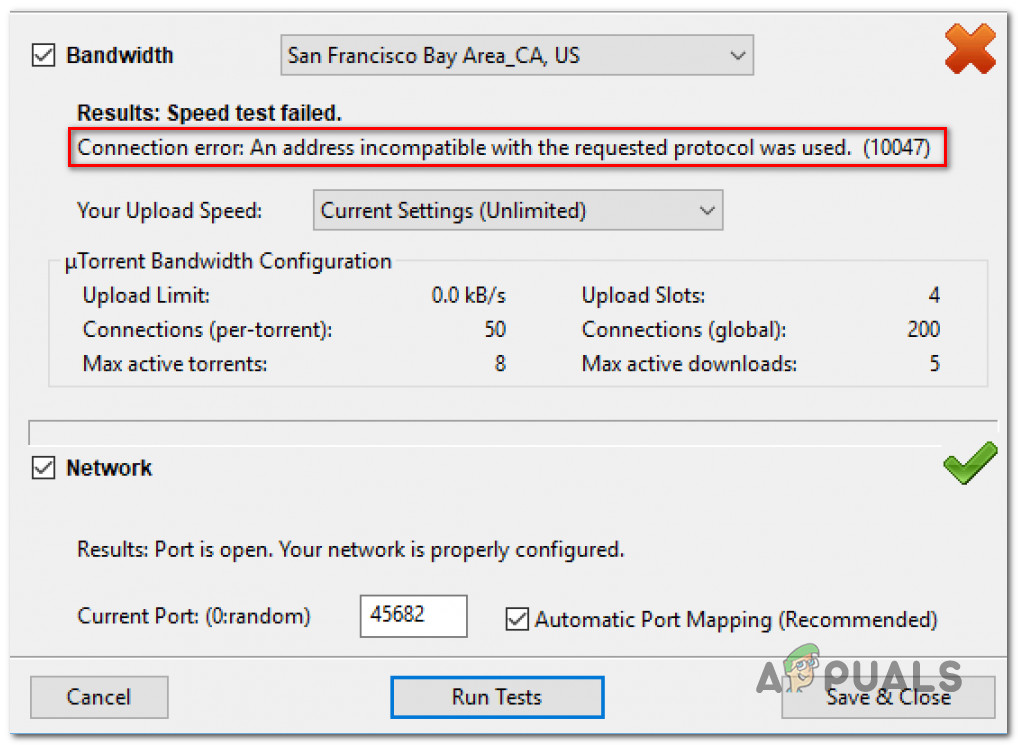
In the majority of documented cases, this particular issue is related to some type of network inconsistency that’s either facilitated by bad TCP or IP data that ends up affecting the stability of your Internet connection. Some users that were also dealing with this kind of issue have reported that they were finally able to avoid the Connection error: An address incompatible with the request protocol was used. (10047) error and complete the bandwidth test by performing a Winsock reset procedure. This operation will successfully allow you to recover your PC from the vast majority of socket errors that might arise after the download of an unknown file or after a malicious script has made its way on your computer. If this scenario is applicable, you should be able to fix the issue by following the instructions below to perform a Winsock reset procedure via an elevated CMD prompt: If the end result is the same and you are still getting interrupted by the Connection error: An address incompatible with the request protocol was used. (10047) error, move down to the next potential fix below.
Method 2: Whitelist the Executable + Port used for Incoming Connections
If a Winsock Reset procedure didn’t work in your case, you have to think about the fact that the security suite that is active on your Windows 10 computer might be actively blocking the incoming connections that uTorrent is managing. If this scenario is applicable, you should be able to prevent the issue from occurring again by accessing your AV settings and whitelisting the executable + the port that is being used by your current installation. In this case, the instructions for doing so will be different depending on if you’re using a 3rd party security suite or the integrated solution (Windows Defender + Windows Firewall) Because of this, we’ve put together 2 separate guides, so follow the one applicable to your particular scenario:
A. Whitelisting uTorrent Executable + Incoming Connection Port on 3rd party security suite
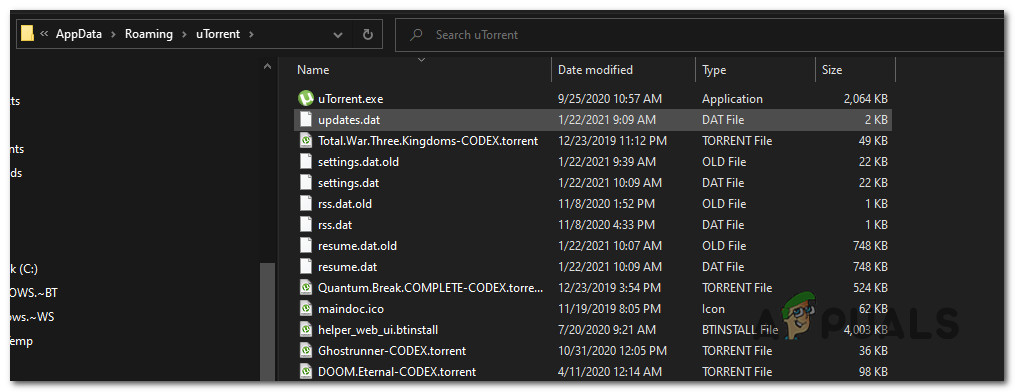
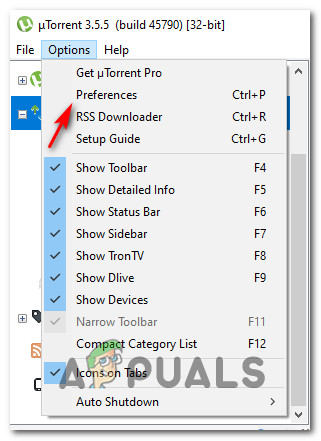
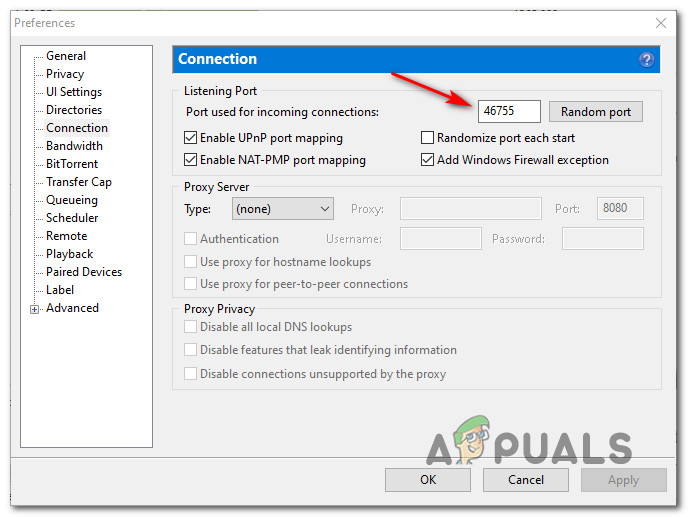
In this case, we can’t provide you with a definitive guide on doing this because the steps of whitelisting will be different from security tool to security tool. You will need to read the official documentation supplied by the developer of the 3rd party Antivirus tool that you’re using or search online for specific tutorials that will show you how to do this. However, there are some common steps that you need to take prior to establishing these whitelisting rules. First, you need to determine where you previously installed your uTorrent suite. If you haven’t installed it in a custom location, you will find the main executable of uTorrent inside C:\Users\madro\AppData\Roaming\uTorrent. Note: However, unless you have hidden folders enabled by default, you will not be able to access the AppData folder because it will not be visible. In this case, you will need to access the View Menu of File Explorer and check the box associate with Hidden Items. Once you know the default location of the main executable of Utorrent, the next step is to figure out which port is currently used by the peer-to-peer client for your incoming connection. Here’s a short step-by-step guide that will show you how to do this: Now that you know both the location of uTorrent and the incoming connection port, you can access the Advanced / Expert settings of your 3rd party antivirus and effectively whitelist every component that might be causing the bandwidth error.
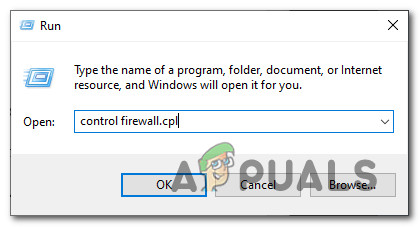
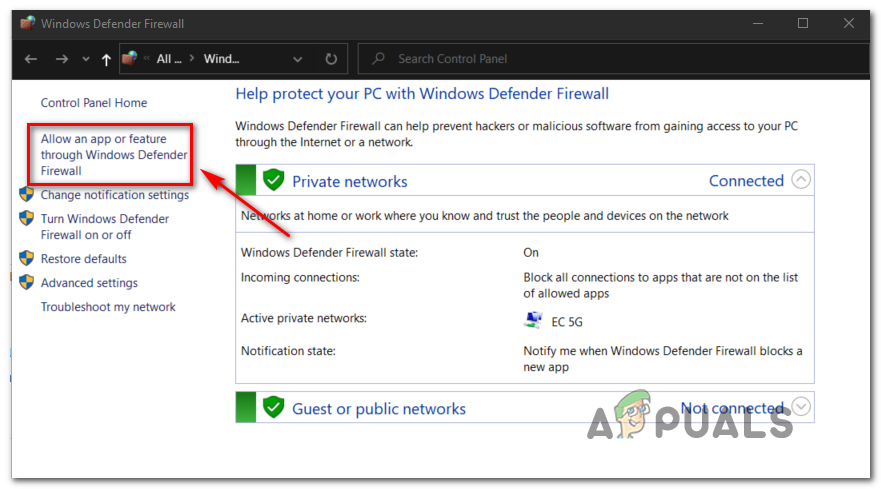
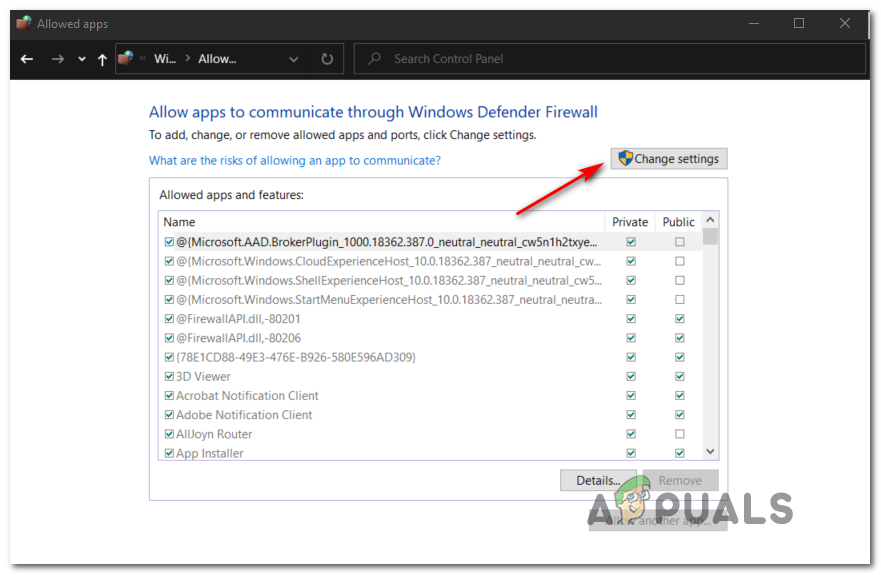
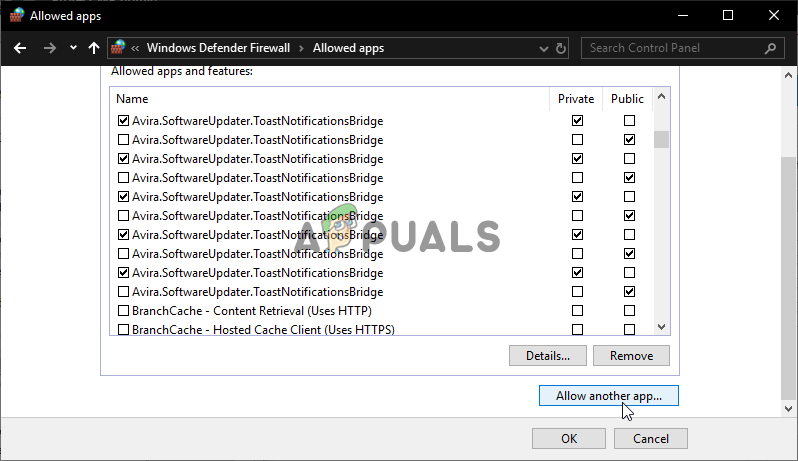
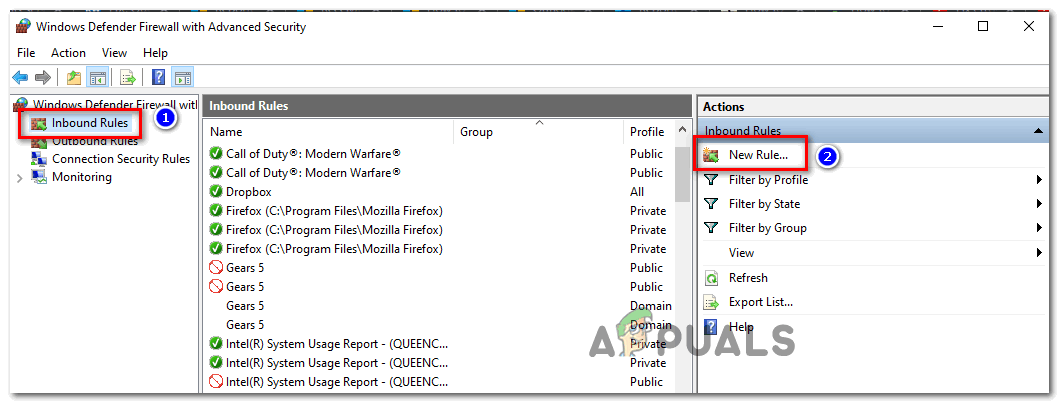
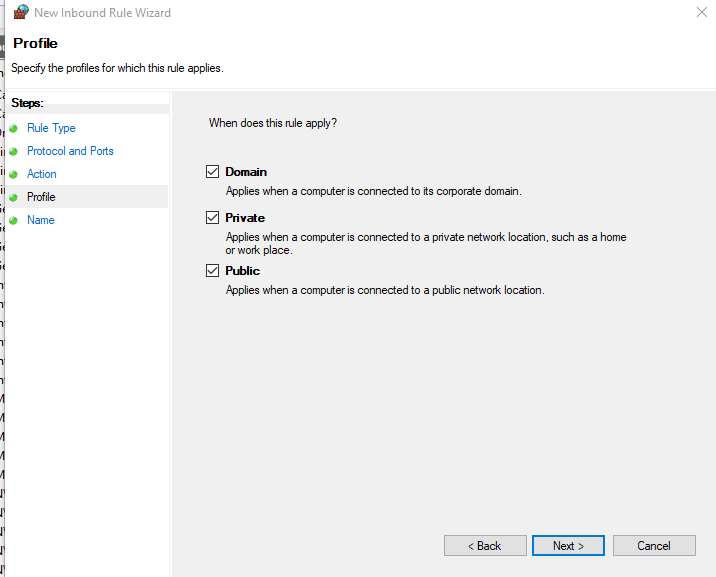
B. Whitelisting uTorrent Executable + Incoming Connection Port on Windows Defender / Windows Firewall
If you are using Windows Defender + Windows Firewall as the default antivirus suite, you will need to go through 2 separate processes in order to successfully whitelist the main executable of uTorrent and ensure that the port used for incoming connections is not blocked. To make matters easier for you, we’ve put together a series of step-by-step instructions that will walk you through the entire process: In case the same problem is still occurring, move down to the next potential fix below.
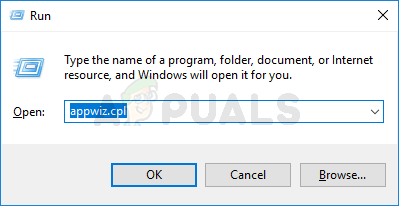
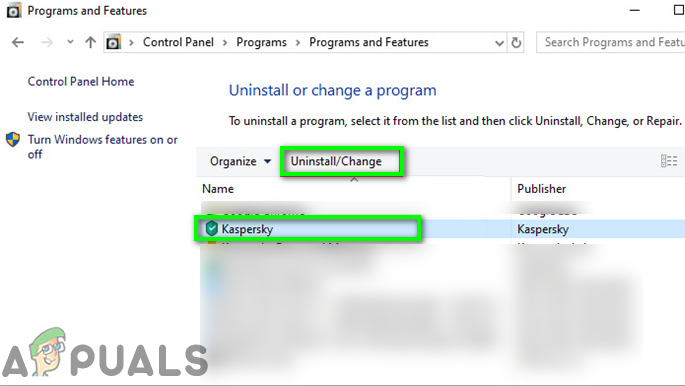
Method 3: Uninstall 3rd-party Culprit
There are a lot of user reports reporting that in their case, a 3rd party Antivirus or firewall suite was being responsible for triggering the An address incompatible with the request protocol was used. (10047) error when performing a bandwidth test inside uTorrent. As it turns out, there are a handful of Antivirus suites that will actively block peer-to-peer connections unless you specifically tell them not to. AVG is among the most popular ones, but there are others that will cause this issue. If you were unable to whitelist uTorrent + the incoming connection port (or you’re not planning to), the only viable fix at this point is to uninstall the problematic 3rd party suite and allow Windows Defender to kick in. If you plan on going this route, follow the instructions below to uninstall the 3rd party AV suite via the Programs and Files menu: If you’re still encountering the same error message, move down to the next potential fix below.
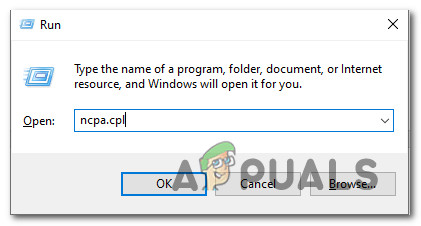
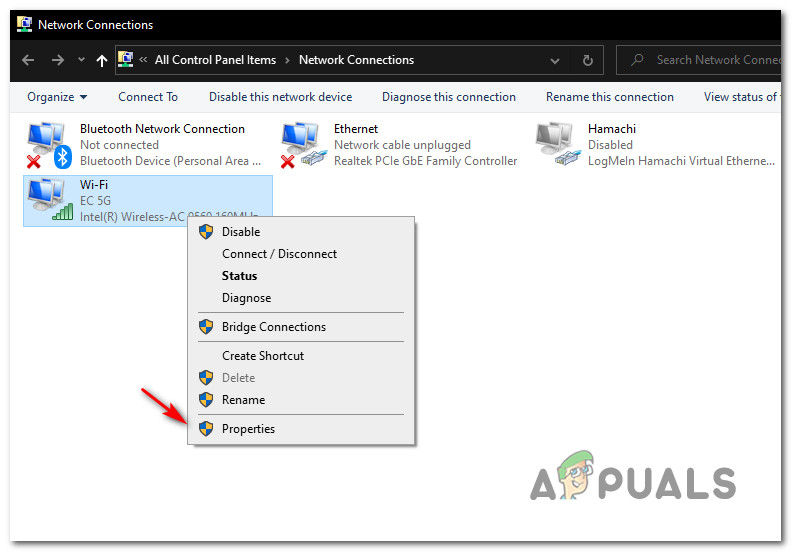
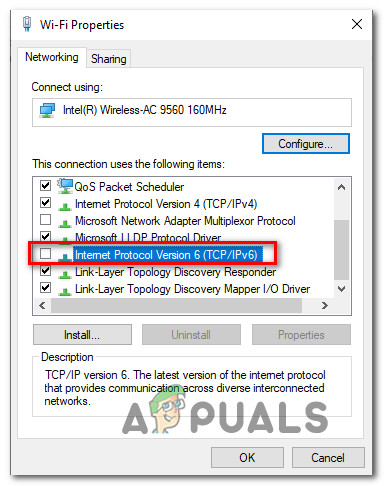
Method 4: Disabling IPv6 on Network Adapter
According to some affected users that were encountering this issue on Windows 10, this issue was resolved after they have disabled the IPv6 on the network adapter. They were successfully able to run the bandwidth test inside uTorrent once they’ve made some changes to the Internet Protocol Version. In case you are not reliant on IPv6, you should consider effectively disable IPV6 – At least temporarily, until you complete the bandwidth test. If you’re looking for step by step instructions on how to do this, follow the instructions below:
How to Manage and Request IP Address Requests in IP Address ManagerYour computer has lost the lease to its IP address on the Network Card with…How to Scan your Local and Remote Subnets for MAC address, DNS, Network Card…SolarWinds IP Address Tracker: Free IP Address Tracking Software Review