While this issue is most commonly found to affect Samsung Galaxy Smartphones, it does not shy away from all the other makes and models of Smartphones out there. An Android device can be forced to display an “Emergency calls only” or “No service” error by one of three things – poor signal strength, some kink or problem in the device’s software, or faulty hardware. As long as the cause of this issue is not faulty hardware such as a defective SIM card or flawed SIM card reading equipment in the device, there are quite a few things that a person can do to try and fix it. The following are the three most effective solutions that can be used to get rid of the “Emergency calls only” and/or “No service” issue:
Solution 1: Manually select the carrier
Manually selecting a Smartphone’s carrier can, in many cases, allow the device to connect to its carrier successfully.
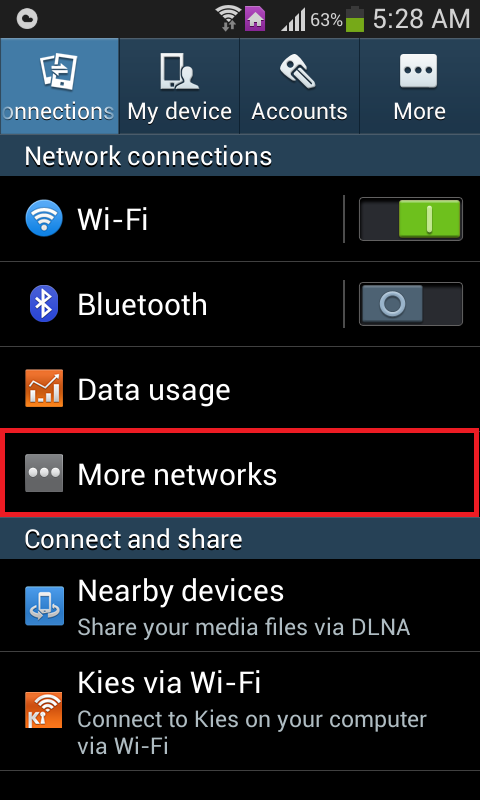
Go to Settings.
Navigate to the Network settings for the device.
Tap on Mobile networks.
Press Network operators.
Allow the device to search for networks. If the device does not automatically start searching for networks, tap on Search networks.
Select the device’s carrier from the list of available networks.
Solution 2: Change the network mode to GSM Only
If an Android device cannot connect to its carrier because of a signal problem, changing its network mode to GSM only can do the trick as 2G signals are much stronger and have much more penetrating power as compared to 3G or 4G signals. Weak signals have also been known to trigger the Failed to Send SMS error with Android phones.
- Go to Settings.
- Find the way to the device’s network settings.
- Tap on Mobile networks.
- Tap on Network mode.
- No matter what mode the device is on, select GSM only.
Solution 3: Use the Ariza Patch (requires root)
The Ariza patch is an Android system patch designed to fix kinks in an Android device’s baseband (modem). Applying the Ariza patch to an Android Smartphone suffering from “Emergency calls only” and/or “No service” issues has significant chances of fixing the device, especially in the case of Samsung Smartphones. Before proceeding, make sure that you root your phone.
- Make sure that the device has root access.
- Install Busybox on the device.
- Download the APK file for the Ariza patch from here.
- Go to Settings > Security and make sure that the installation of applications from unknown sources has been allowed.
- Install the Ariza patch.
- Open the Ariza patch.
- Tap on V[0,5] patch uygula. Wait for a few minutes, and once the patch has been applied to the device, reboot it.
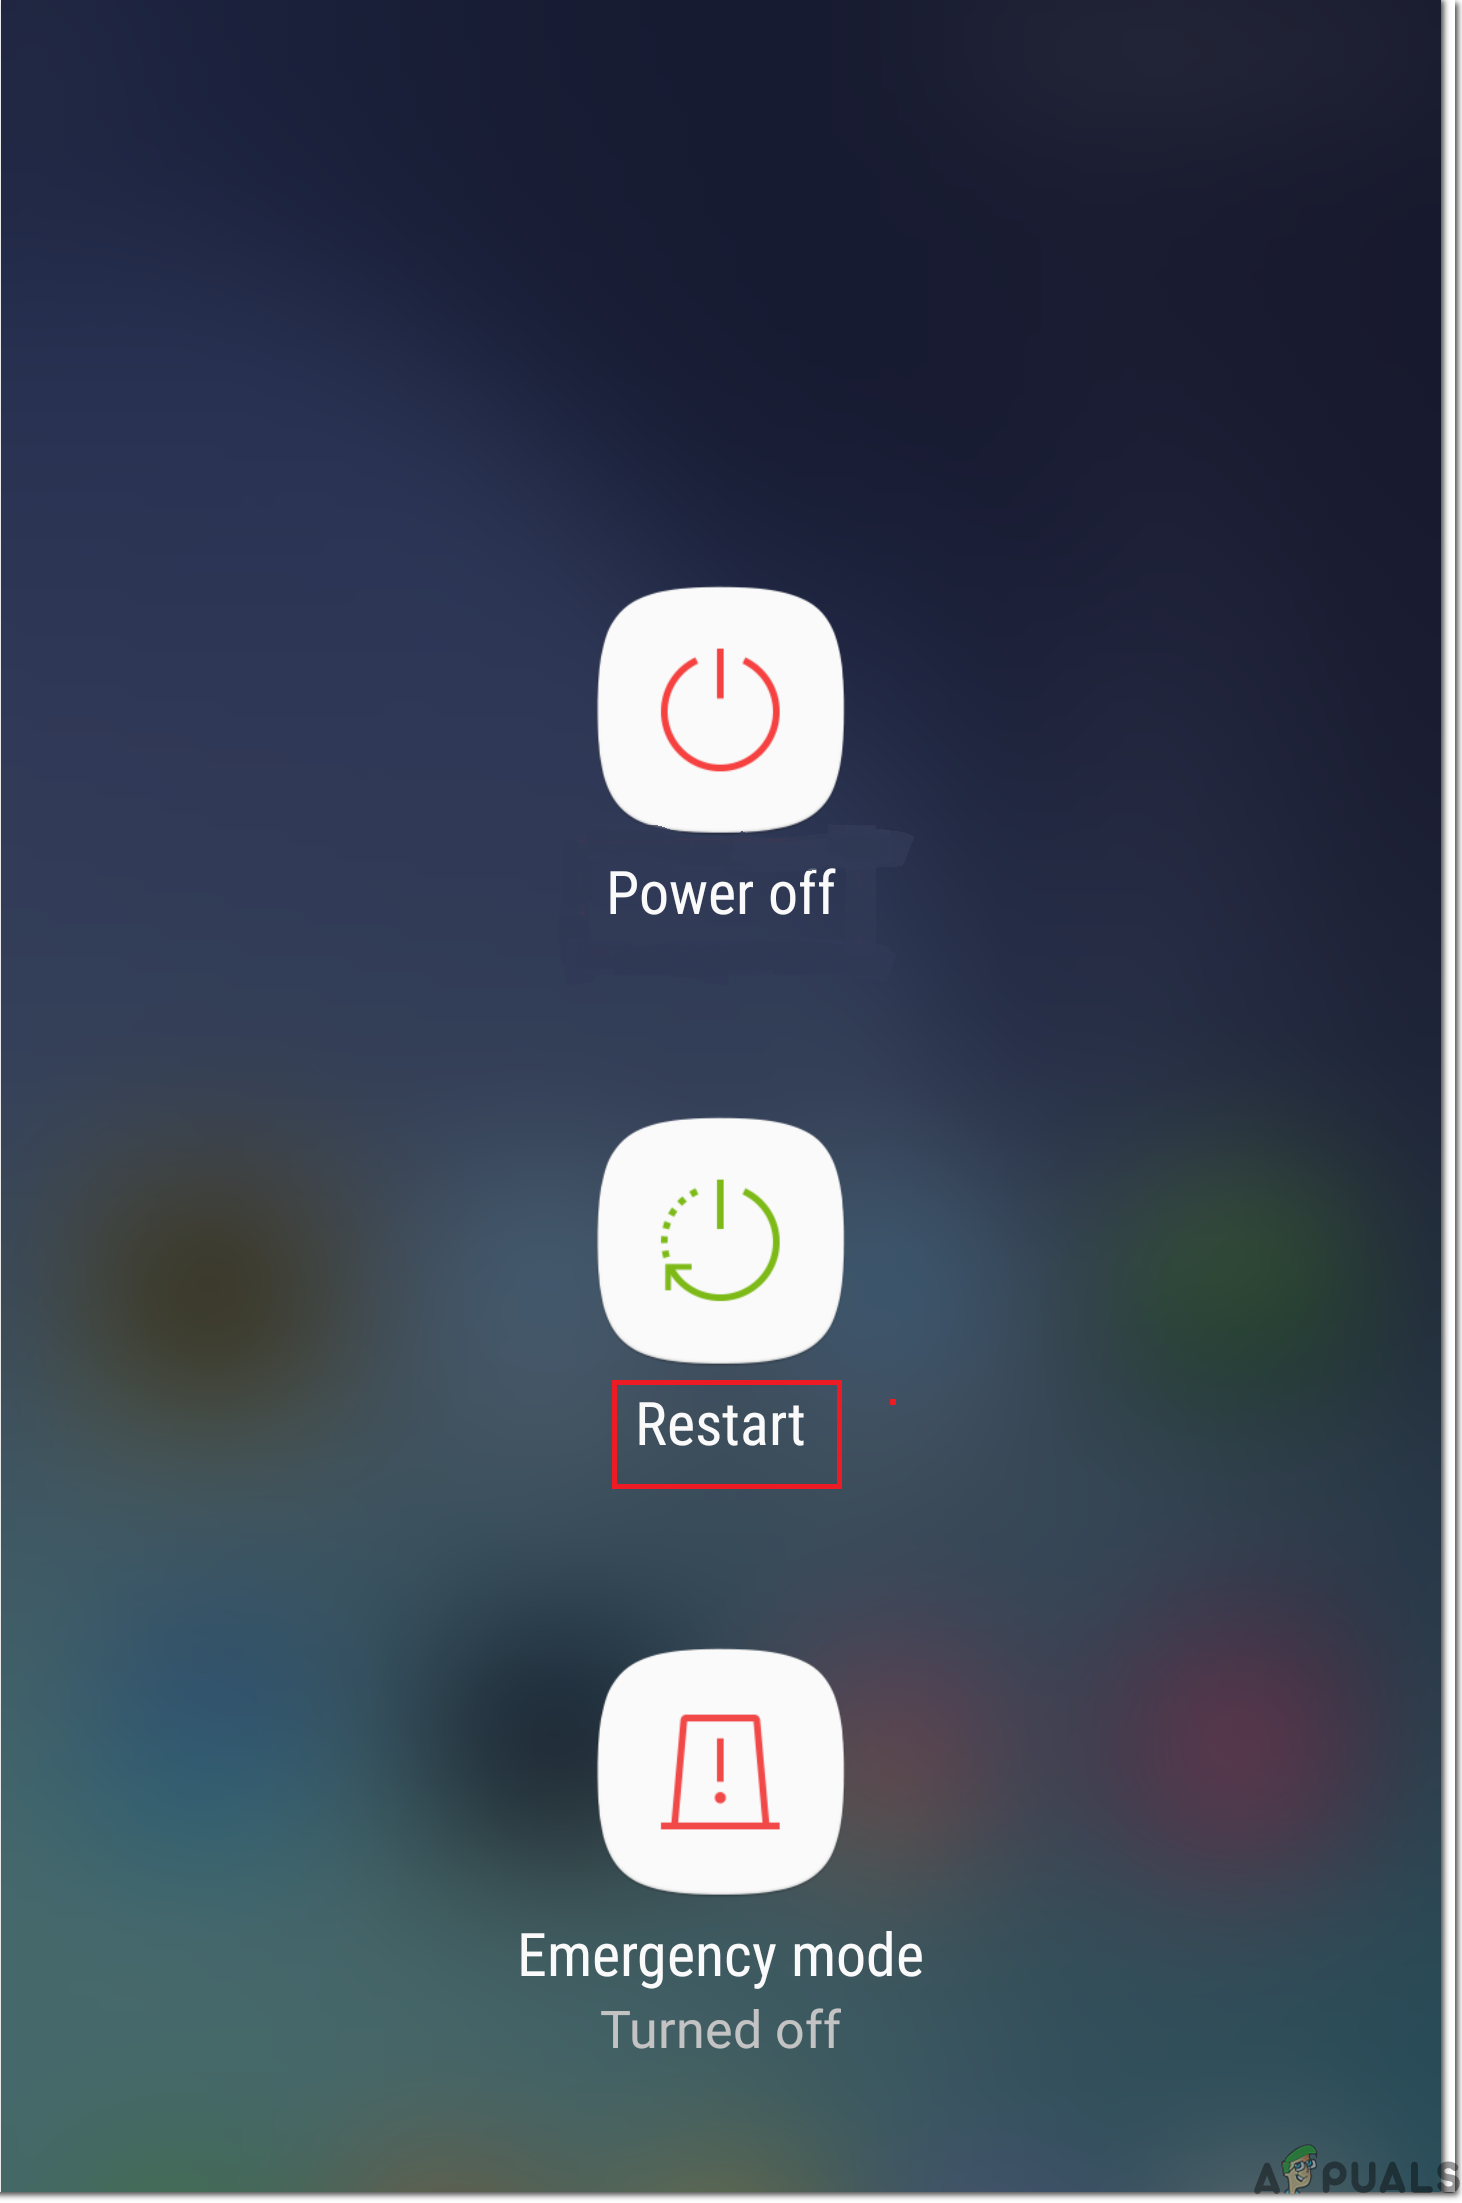
Solution 4: Soft Restart
In some situations, the phone might’ve acquired a glitch due to which it is unable to properly register the SIM card installed inside the mobile phone. Therefore, it is always a good idea to perform a restart to ensure that the glitch is removed. For that:
Solution 5: Reinsert SIM Card
In some cases, the SIM card might’ve slightly been displaced from its normal position inside of the SIM tray. When this happens, the easiest fix is to just turn off your device from the reboot menu and take out the SIM tray. After that, remove the SIM card from the SIM Tray and make sure to blow air onto the SIM card and inside the SIM Tray slot to get rid of any residue or Dust Particles. After this, make sure to accurately place the SIM card on the SIM Tray and then check to see if doing so fixes the issue.
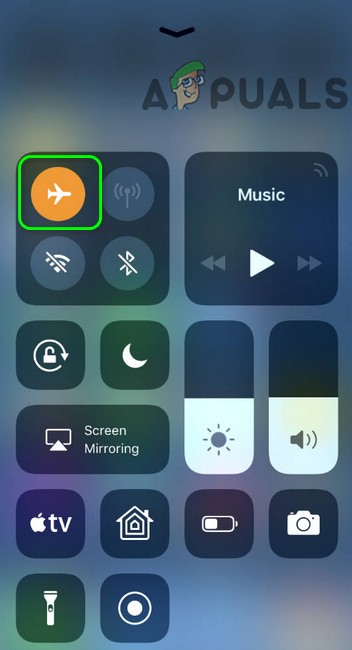
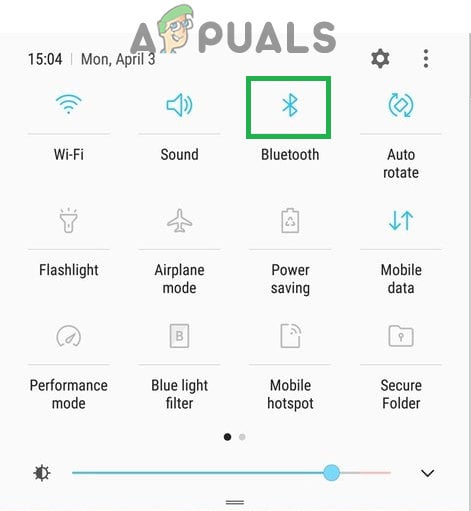
Solution 6: Toggle Airplane Mode
In certain situations, the SIM card might be bugged inside the phone due to which the phone is unable to properly register it on the mobile network. Therefore, in this step, we will be toggling the airplane mode to sort of reinitializing this process and get the SIM working as normal. In order to do this, follow the steps below.
Solution 7: Prevent Fixed Dialing
In some situations, the Fixed Dialing feature on your phone might have been enabled due to which this error is being seen on your mobile. Therefore, in this step, we will be disabling this feature on our mobile. In order to do this, we will have to reconfigure it from our settings. For that:
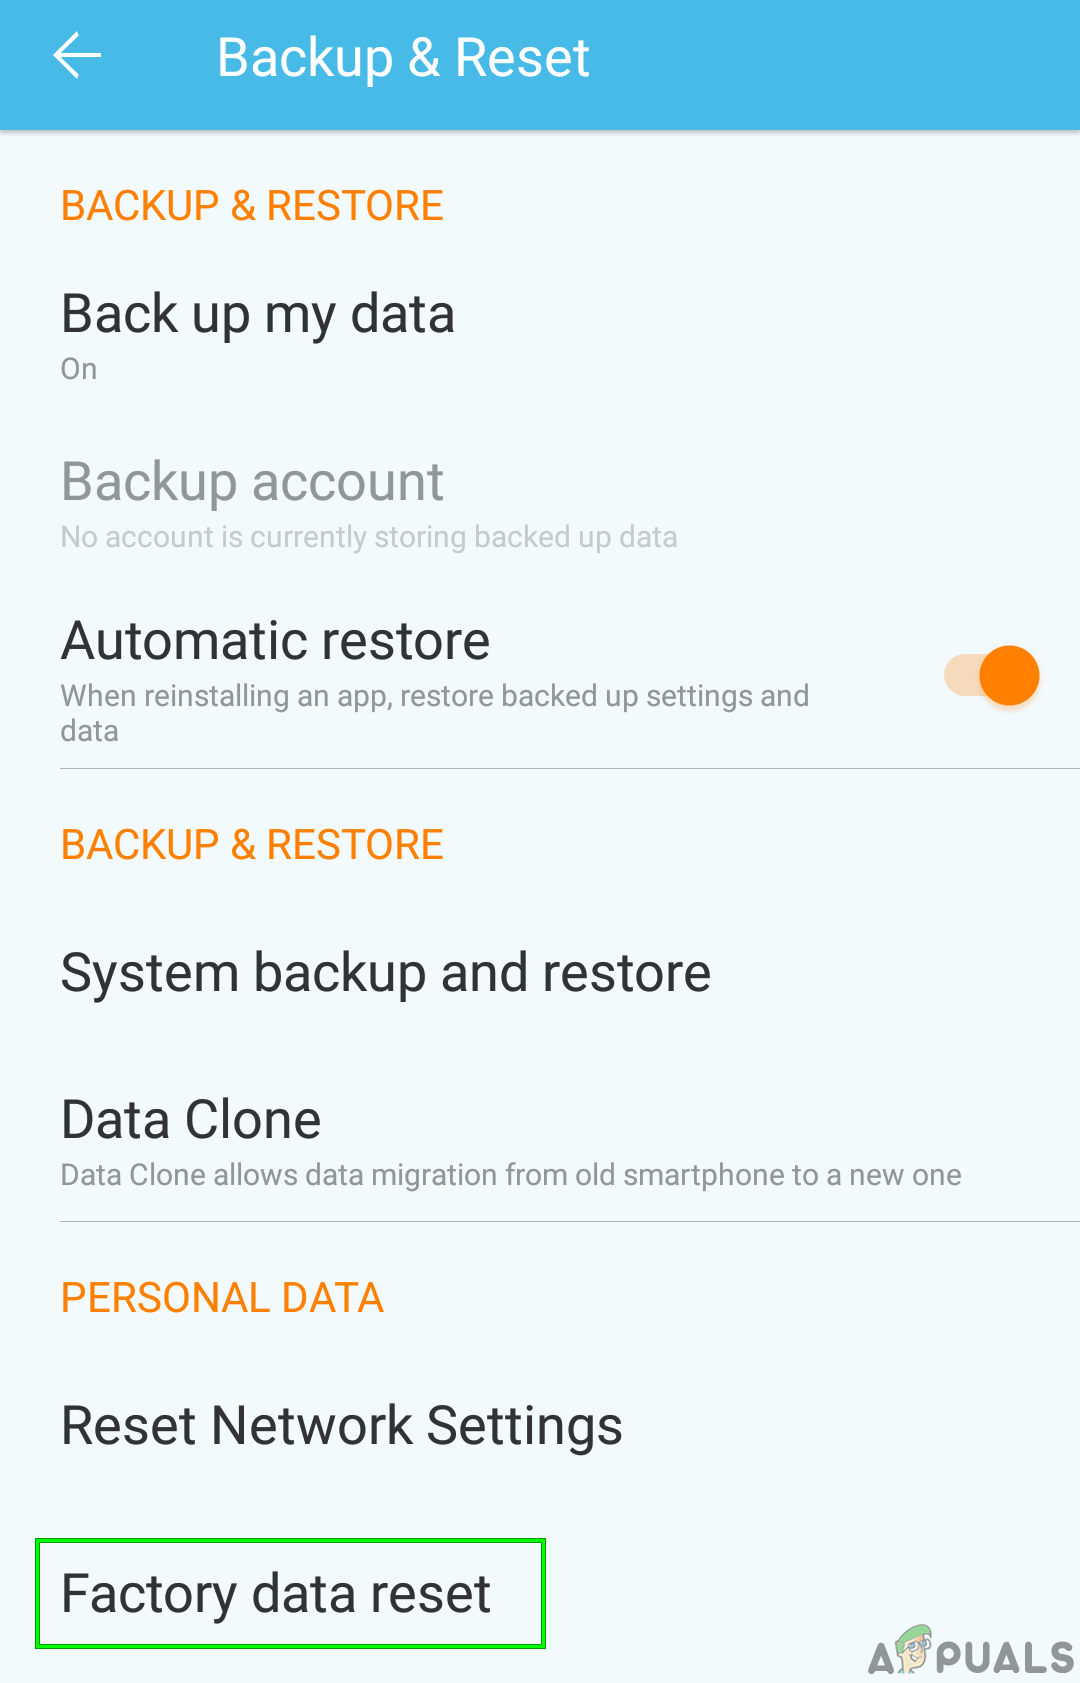
Solution 8: Perform Factory Reset
It is possible that there is a faulty app or configuration on your device that is preventing the SIM card from functioning properly. It is also possible that the software installed on your mobile phone has been bugged and to get rid of any such issues, we can perform a full Factory Reset on our device to rule them out. In order to do this, make sure to back up any necessary data beforehand and follow the steps below.
Solution 9: Verify IMEI
It is possible that the IMEI number on your cellphone might’ve been changed due to a software flash or due to any other reason. The IMEI is like a physical trace of the cellphone device and it is a unique number that is assigned by the manufacturer to identify the device and the same number is also used by the SIM card provider to propagate their network services on your device. However, if this number has been replaced or improperly configured, you might get the SIM card issue where only emergency calls are allowed. In order to check this:
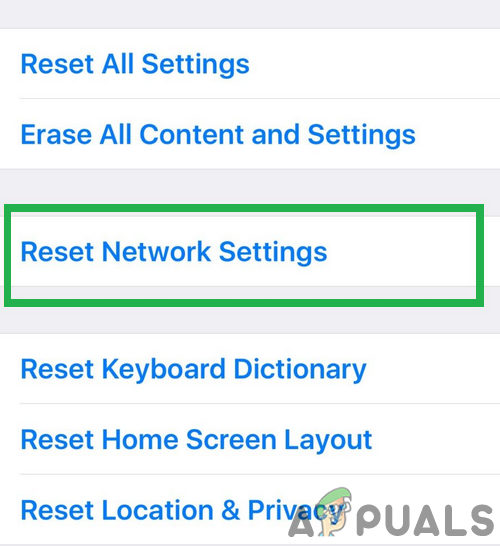
Solution 10: Reset Network Settings
It is possible that the network settings on the mobile were changed manually or they were changed automatically by the phone and now they have been misconfigured due to which this issue is arising. Therefore, in this step, we will reset the network settings to the default ones in an attempt to get rid of this issue. In order to do so:
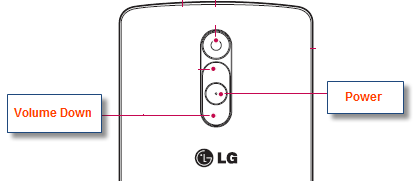
Solution 11: Clear Cache Partition
Some data is cached by almost all applications to decrease load times and to provide a more optimized experience to the user. However, sometimes this cached data can be corrupted and it might interfere with system functions. Therefore, in this step, we will be booting the phone into the reboot menu to clear out the cache partition. For that:
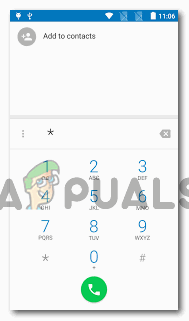
Solution 12: Run SIM Card Test
It is possible that the SIM might not be functioning properly because the phone is unable to properly register it on the network and verify the signal strength. Therefore, in this step, we will be running a SIM card test to verify and isolate the issue on the phone and ensure that the SIM card is not at fault, for that, follow the steps that have been listed below.
Solution 13: Check for Faulty SIM Card
It is possible that in some cases you might have damaged your SIM card through water damage or you might have broken or cracked it during usage. This seems highly unlikely but there have been cases where the SIM card doesn’t work after water or physical damage. Therefore, first of all, remove the SIM card from the device after powering it down and place it inside another phone and check if the SIM card works fine with that phone. If the SIM card doesn’t work with the other phone as well, it means that the issue doesn’t exist within your phone and it is limited to the SIM card only. Furthermore, you also need to ensure that you have recharged your SIM card and that your account is in good standing with the service provider. It might be the case that you have not paid your dues due to which the SIM card has been blocked by the service provider. Verify that it is not the case and then check to see if the issue still persists.
Solution 14: Remove SD Card
It has been seen in some rare cases that the user was unable to utilize their mobile devices with the SD card inserted inside the SIM tray. This seems like a weird solution to this problem but if you have been unable to fix it so far, you can give it a go and power down your device, take out the SIM tray and remove the SD card from the mobile device. After doing so, reinsert the SIM tray after seating the SIM card properly and power on the device. Check to see if the issue persists after the device powers on.
Solution 15: Check for Updates
It is sometimes the case that the Phone company that you are using might’ve released a software update that might’ve broken some components of the phone and that might be preventing you from being able to use the SIM card properly. As most companies release software patches immediately if there is such an issue, we will try to check if there are any available for your device. For that: If none of the methods shown above helped you at all, it’s possible that the carrier you are using having some signal issues try contacting them and explain the issue to them. If they said that everything seems to be fine, then there is something wrong with your phone hardware.
Zoom Free Users Will Not Get End-To-End Encryption For Messaging And Calls As…Fix: Deferred Procedure Calls and Interrupts Service Routines High CPU and Disk…How to Make FaceTime Calls on Android?Apple is Finally Rolling Out Emergency SOS via satellite For Users in the US and…