What’s causing the 0xc0000017 BSOD on Windows?
Method 1: Stopping the AV suite (if applicable)
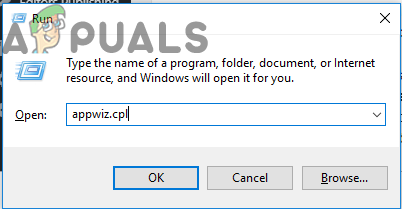
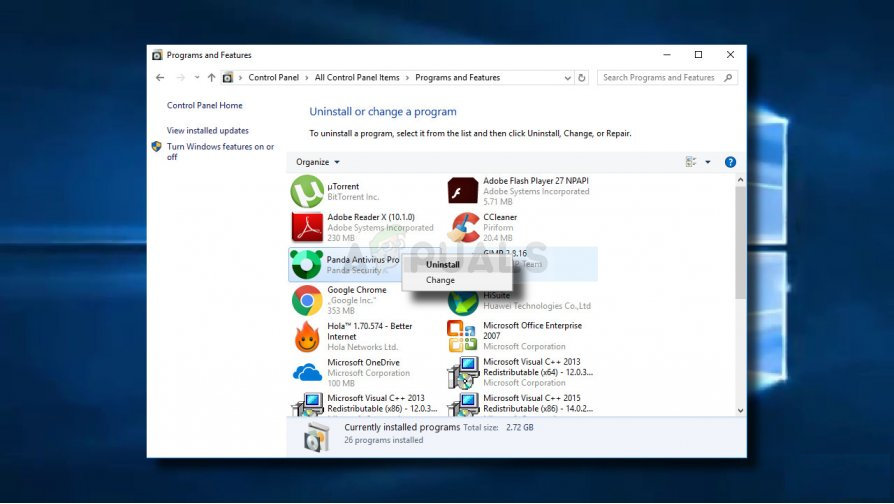
If you’re facing this issue when attempting to upgrade your Windows version to Windows 10, you should start this troubleshooting quest by eliminating the possibility of 3rd party interference. As it turns out, it’s possible that an overprotective Antivirus suite is stopping the upgrading operation in its tracks due to a false positive. Comodo, Avast, McAffee are most commonly reported for causing this behaviour, but there might be others. If this scenario is applicable and you’re actually using a 3rd party suite that might cause this interference, you should test to see if the operation is successful if you’re doing it while the Antivirus suite is disabled or uninstalled. You can start things slowly by disabling real-time protection and retrying the upgrading process. If the 0xc0000017 BSOD no longer appears, you can conclude that your AV was causing the problem. With most security suites, you can do it directly from the taskbar menu. However, if you’re using a 3rd party security suite that includes a firewall, disabling the real-time protection will not be enough since the same security suite will remain firmly in place. If this scenario is applicable, the only viable fix is to uninstall the Antivirus + firewall completely and ensure that there are no leftover files that might still cause the same behaviour. Here’s a quick guide on how to uninstall the problematic 3rd party suite and remove any remnant files that might still prevent the upgrade from taking place: If the same issue is still occurring or this method wasn’t applicable to your particular scenario, move down to the next potential fix below.
Method 2: Disconnect all external devices
The 0x0000017 is associated with ‘bad memory’, but in reality, the problem most likely occurs because the memory allocation is too high, so the system doesn’t have enough left to complete the upgrading/installation process. This can be resolved easily by adding additional RAM, equipping your computer with the hardware necessary to complete the process. But if you have no plans of upgrading your PC specifications, you can probably easy the memory allocation by unplugging every unnecessary USB device. Several affected users have confirmed that this method was successful for them. If the device is not running, there’s no need to allow it to reserve memory. With this in mind, unplug every non-essential USB device and repeat the process that was causing the 0xc0000017 – There isn’t enough memory to create a ramdisk device. If this scenario is not applicable or you’re looking for a different approach, move down to the next potential fix below.
Method 3: Updating motherboard drivers
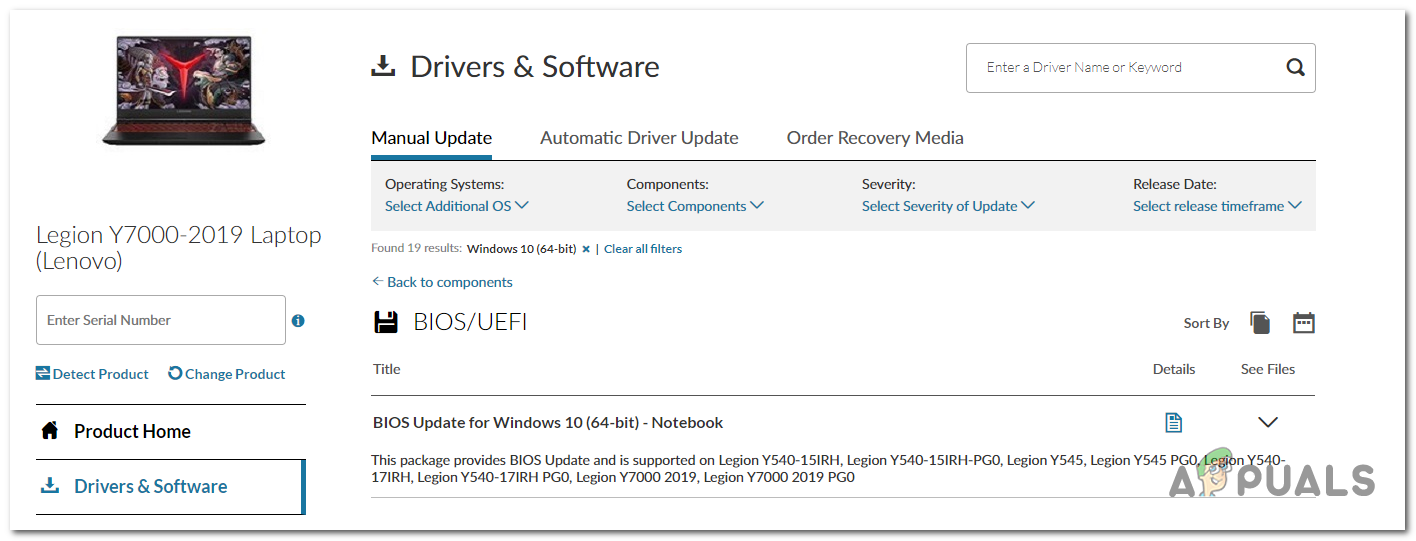
As it turns out, this problem can also be caused by a severely outdated motherboard driver that is not compatible to accommodate Windows 10. Several users that we’re encountering the 0xc0000017 error during the upgrade to Windows 10 have reported that the process was finally successful after they updated their motherboard driver to the latest version. Windows Update is notoriously known for failing to update motherboard drivers, so chances are you will need to do it manually. Here’s a quick guide on how to update your motherboard manually: If the same 0xc0000017 error code is still occurring or you already have the latest driver version, move down to the next potential fix below.
Method 4: Cleaning the bad memory entries
Microsoft has already investigated this issue and confirmed that this particular issue can also occur in instances where the OS tries to create the RAM disk for the Windows PE environment during the boot process. If during this operation, bad memory blocks are discovered in the BCD store, you can expect to see 0xc0000017 error code as a result. If this scenario is applicable, you can resolve the issue fairly easily by using a series of CMD commands capable of checking and cleaning bad memory entries in the BCD store. Here’s a quick guide on how to do this: If you’re still encountering the 0xc0000017 error code even after you followed the instructions above, move down to the next potential fix below.
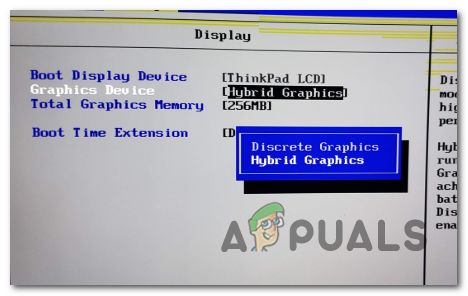
Method 5: Disabling Hybrid Graphics from BIOS
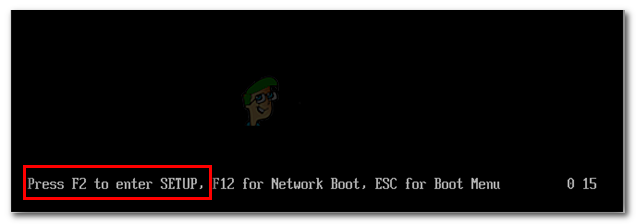
As it turns out, this issue can also occur due to a GPU feature present on integrated AMD GPU cards called Hybrid graphics. Several affected users have confirmed that after going into their BIOS settings and disabling Hybrid Graphics from the Device Configuration menu, they upgrading / clean install process completed successfully with no additional problems. This method is typically reported to be successful with ZBook models manufactured by HP. Here’s a quick guide on disabling Hybrid Graphics from BIOS settings: If the same problem is still occurring, move down to the next method below.
Method 6: Upgrading after a clean boot (if applicable)
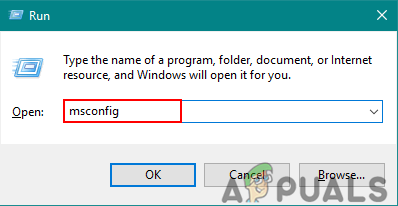
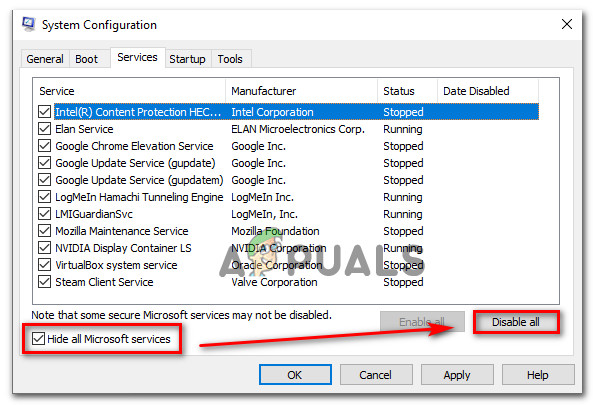
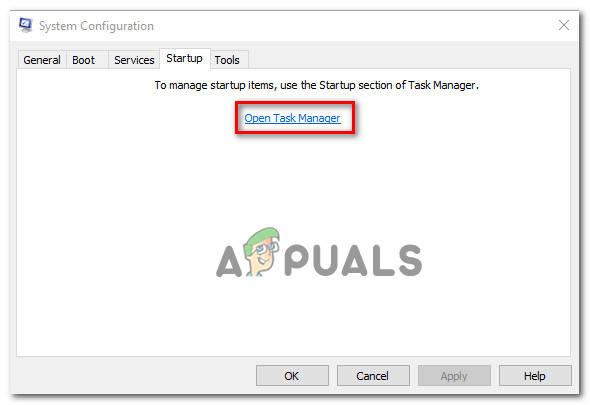
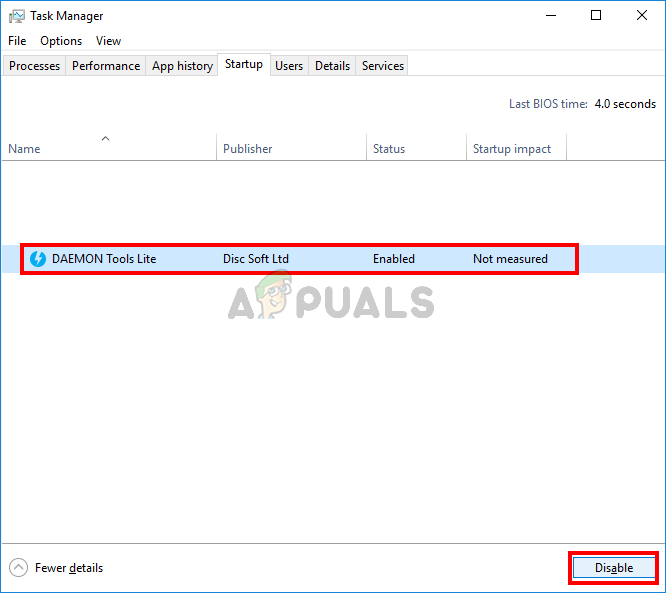
As it turns out, there are a lot of potential culprits that might be responsible for the apparition of this issue. And it’s not just 3rd party Antivirus suites that might interfere with the upgrading installation, it’s also utility app that is normally not suspected in a scenario where a BSOD is involved. If you’re encountering the 0xc0000017 BSOD during an attempt to upgrade an older Windows version to Windows 10, you should eliminate the possibility of a 3rd party interference by re-trying the upgrade after a clean boot. When you achieve a clean boot state, your computer will start without any type of 3rd party service, process or startup item that might get in the way of the upgrading process. Here’s a quick guide on achieving a clean boot state in which you can retry the operation:
Fix: Bluescreen After Installing Drivers on Windows 11If you get the Windows 10 Blue Screen Recovery Error 0x0000185FIX: Error 5010F When Reinstalling OS X via Internet RecoveryHow to Disable / Enable Windows Recovery Environment on Windows 10?