After investigating this particular issue thoroughly, it turns out that there are several different underlying causes that might be responsible for the apparition of this error code. Here’s a list of potential culprits that might be responsible: Now that you are familiar with every potential culprit that might be responsible for this error, here’s a list of potential fixes that other affected users have successfully used to resolve this error code:
Install a Non-Modified Windows Version (if applicable)
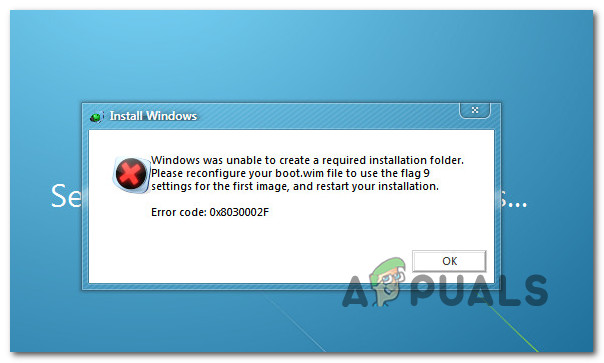
One of the most common causes that might end up producing this error code is a situation where the user attempts to install or upgrade their current Windows version from a modified version of the installation media (DVD or flash drive). You can expect to see the 0x8030002f if you have a genuine Windows 7 version and you want to upgrade to the latest version of Windows 10 with a modified installation media. If this scenario is applicable and the installation media that you are trying to use is not genuine, the only way forward is to ensure that you are using genuine installation media. If you’re looking for step by step instructions on creating compatible installation media (USB or DVD) for Windows 10 or Windows 7, use the following guides:
Create a Windows 10 Bootable Installation media Using RufusCreating a Windows 7 Installation Media using the Download Tool
If this scenario is not applicable to your particular situation as the installation media that you’re using is genuine, move down to the next potential fix below.
Deploy a CHKDSK scan
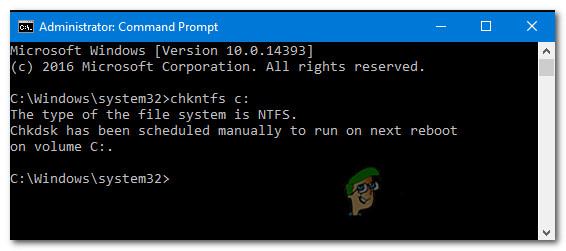
If you only see the 0x8030002f error while you attempt to upgrade an older Windows version to Windows 10 using compatible installation media, you’re most likely dealing with some kind of HDD / SSD sector corruption that is affecting the MBR or BCD files. In case you find yourself in this particular scenario, you should go for a CHKDSK (Check Disk Scan) to ensure that no logical sectors are causing this behavior. If this is the source of the 0x8030002f error, CHKDSK will replace the corrupted logical sectors with unused healthy equivalents. Note: CHKDSK comes pre-installed on every recent Windows version including Windows 7 and Windows 8.1 To deploy this scan, follow these instructions to deploy a CHKDSK scan from an elevated Command prompt. Note: Should the utility discover some corrupted sectors that cannot be replaced, you can conclude that the drive is failing and you’ll need to look for a replacement as soon as possible. If you already performed a CHKDSK scan and the same kind of issue is still occurring, move down to the next potential fix below.
Run SFC and DISM scans
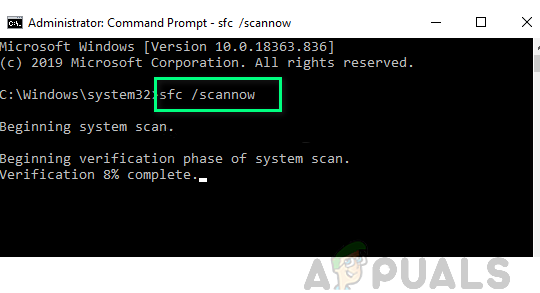
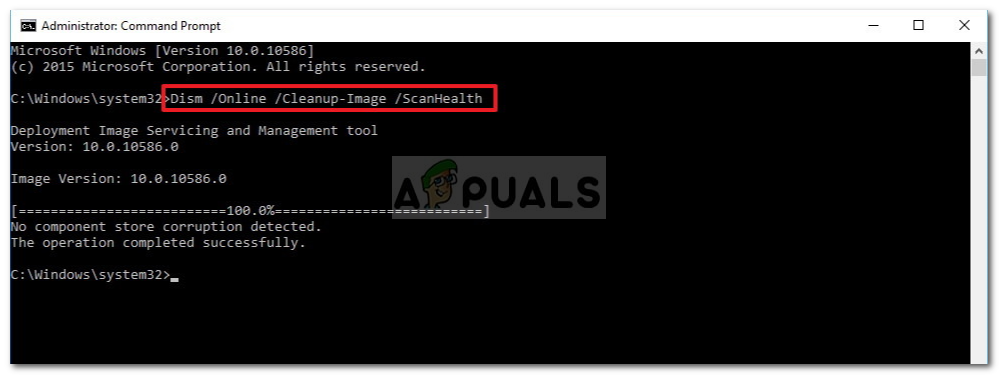
Keep in mind that this 0x8030002f error is often associated with some kind of system file corruption, so your next step (if the first methods have failed) is to run a couple of built-in utilities that are capable of fixing the most common causes that will cause widespread system file corruption. Running SFC (System File Checker) and DISM (Deployment Image Servicing and Management) scans in quick succession should allow you to fix the big majority of potential issues that might be triggering this error code. The two built utilities share some similarities, but we recommend running both types of scans in quick succession in order to maximize your chance of fixing the issue without having to do a clean install or repair install. You should start with an SFC scan. This scan will use a local archive to replace corrupted Windows files with healthy equivalents – NO Internet Connection is required. Note: After you start this operation, avoid closing the elevated CMD window or restarting/shutting down your computer. Doing this exposes your PC to the risk of additional local issues affecting your HDD / SSD. Once the SFC scan is complete, reboot your computer and initiate a DISM scan once your computer boots back up. Note: Different from an SFC scan, DISM requires a stable Internet connection to replace corrupted files with healthy equivalents. This is necessary because instead of using a local file archive like SFC, DISM uses a sub-component of Windows Update to download fresh copies untainted by corruption. After the DISM scan is complete, restart your computer one final time and see if the problem is fixed once the next startup is complete. If the same problem is still occurring, move down to the next potential fix below.
Repair the Boot Configuration data
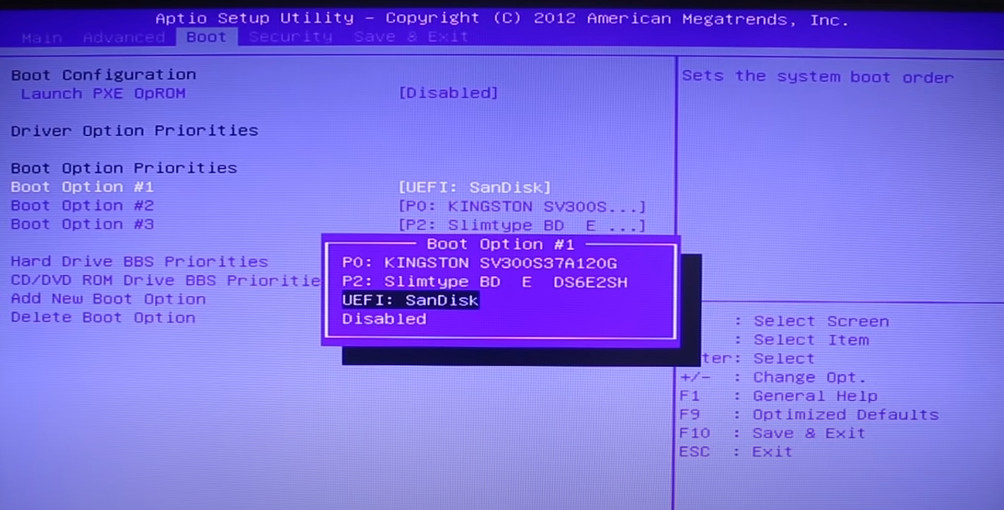
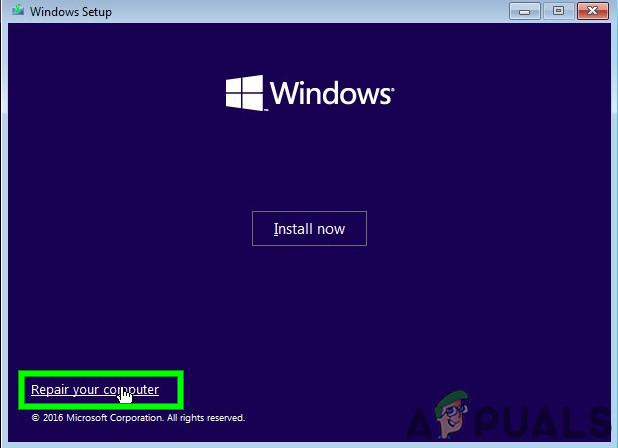
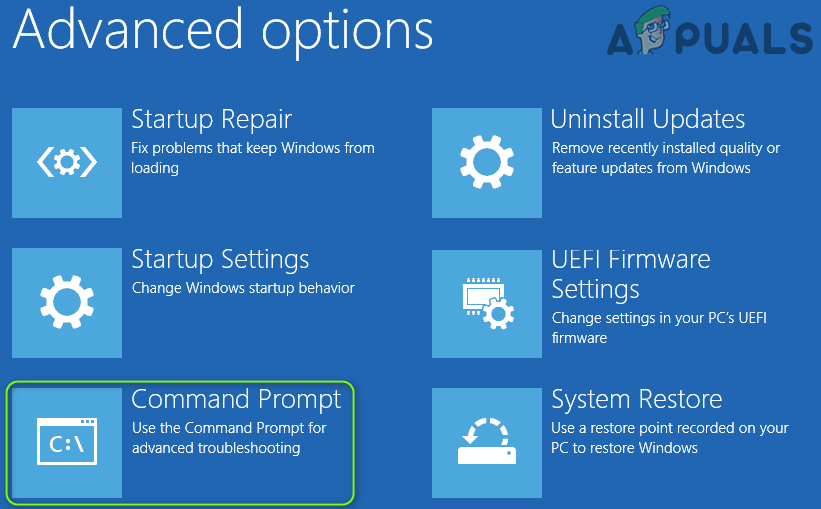
If you see this error while attempting to upgrade your Windows version to the latest and every other potential fix above has failed in your case, you should investigate is a potential corruption that might be affecting the MBR files or boot configuration data. Use the Boot Configuration Data (BCD) utility to locate the Windows boot files on all disks and add them back to the boot list so that the booting sequence can locate them during startup. This fix is especially helpful in situations where you are dual-booting. IMPORTANT: This method will require a compatible installation of Windows installation media. In case you don’t have one at the ready, you can create the Windows installation media from scratch and load it on a USB drive. After you ensured that you meet all the requirements, follow the instructions below:
Fix: Error 0xc0000409 when Upgrading or Installing WindowsHow to Fix ‘Error Code: 0xa0000400’ When Upgrading to Windows 11How to Fix Error 0x80070015 when Upgrading to Windows 10How to Fix Error 0x8007007e When Upgrading to Windows 10