There are a number of different ways Google Lens may stop working. Lens may simply not work the way it’s supposed to and identify objects within images, or it might not even start up and, instead, display an error message of some kind to the user – or one of half a dozen different things. In addition, there is a different cause behind each instance of Lens not working.
What causes Google Lens to not work?
How to Resolve Issues with Google Lens
Since there are a number of different possible causes for Google Lens not working on your device, there is no one cure-all solution or magic bullet to combat this predicament. There are, however, a few different solutions you can use to try and resolve this problem.
1. Make sure that the Google Lens app is installed on your device
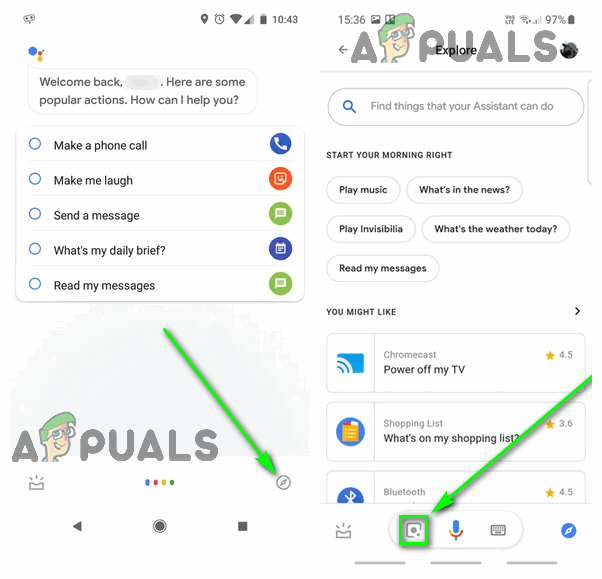
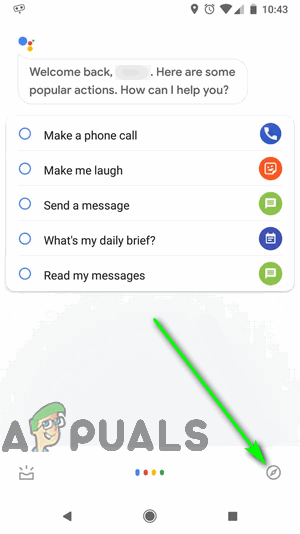
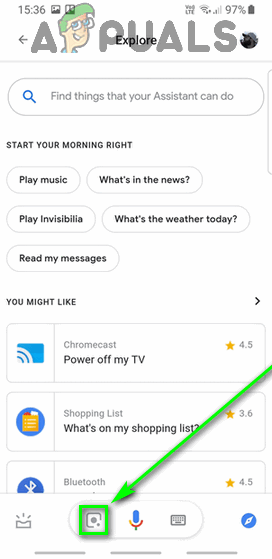
Google Lens has a dedicated app on the Android Operating System, and only when this app has been downloaded do most Android devices become capable of using Lens in real-time. Unless you have the app installed on your Android device, you will not be able to see the Google Lens icon in Google Assistant. If the problem you’re faced with is not having the Lens icon anywhere in Google Assistant, head on over to the Google Play Store and download the Google Lens app. Once the app has been installed, fire up Google Assistant by long-pressing the Home button and tap on the Compass icon in the bottom-right corner of your screen – you should now see the Google Lens icon next to the Microphone icon on the Explore page.
2. Try scanning the area of interest again
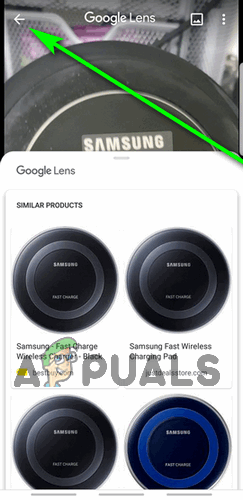
If Google Lens is unable to identify any objects in real-time, one of two things is happening: there are simply no objects in the shot that Lens is capable of identifying and interacting with, or Lens is malfunctioning. Google Lens depends on a combination of AI, machine learning and image recognition to identify and interact with objects in real-time, and if any of these technologies fail, it will not be able to do what it is supposed to do. In any case, scanning the area of interest at least once more is definitely worth it. Note: If Lens identifies the wrong object, simply tap on Back, scan the area again and, if need be, tap on the object you’re interested in to nudge Lens in the right direction.
3. Turn on your device’s flash to illuminate the area
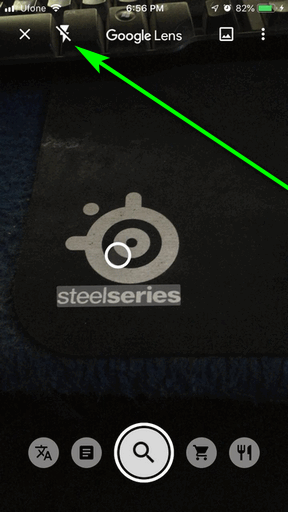
If you’re using Google Lens in a low-light environment, there is a good chance the program will misidentify Points of Interest (or won’t be able to identify any at all!). If that is the case, you can simply brighten up the area you’re scanning using your device’s flash.
4. Activate Google Lens
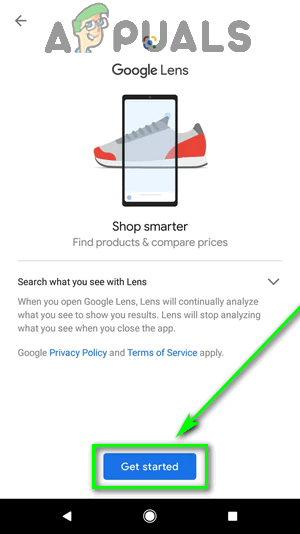
Google Lens may be glitching out on you or not working because you haven’t set it up yet. Android users who have downloaded the Google Lens app need to first set up and activate Lens before they can use it seamlessly.
5. Clear the cache and data for the Google Photos app
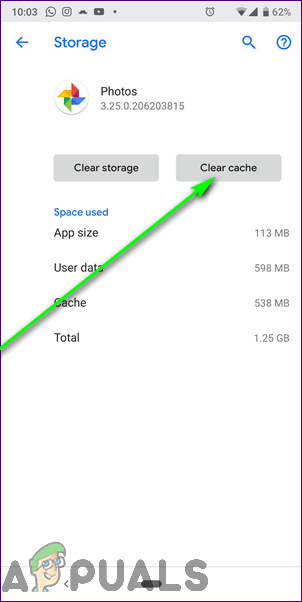
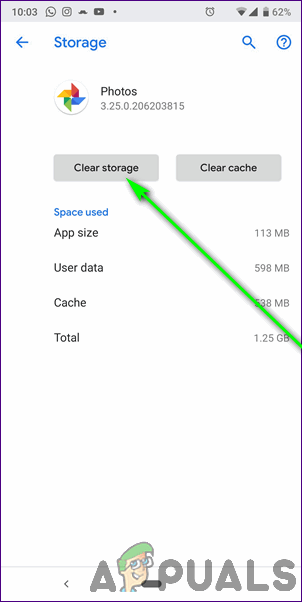
People trying to use Google Lens on existing images through the Google Photos app have reported Lens not working and displaying an error message that reads: “Something went wrong. Google Lens is not available.” If you’re in a similar situation, the root of this problem actually lies not in Google Lens, but in the Google Photos app, and is fixable. The Android OS maintains a cache partition for the entire device, as well as a small cache for each individual app. Clearing this cache for the Google Photos app, along with the app’s data, might just be enough to get Google Lens working for you.
More Pixel 3 XL Leaks Show Google Camera with Lens Suggestions, and…How to Use Google Lens on Android and iOS?Lens Becomes the Primary Visual Search Experience on Desktop Google ImagesSamsung’s Note 20+ May Have a Superzoom Periscope Lens Afterall