After more and more people have been complaining about this error, we have decided to take an in-depth look into it to see what can cause this issue. Here is a short list of all the possible causes that might trigger this error: Now that you are also aware of all the possible causes of this issue, here is a list of all the methods that people have used in order to fix this Windows 11 issue:
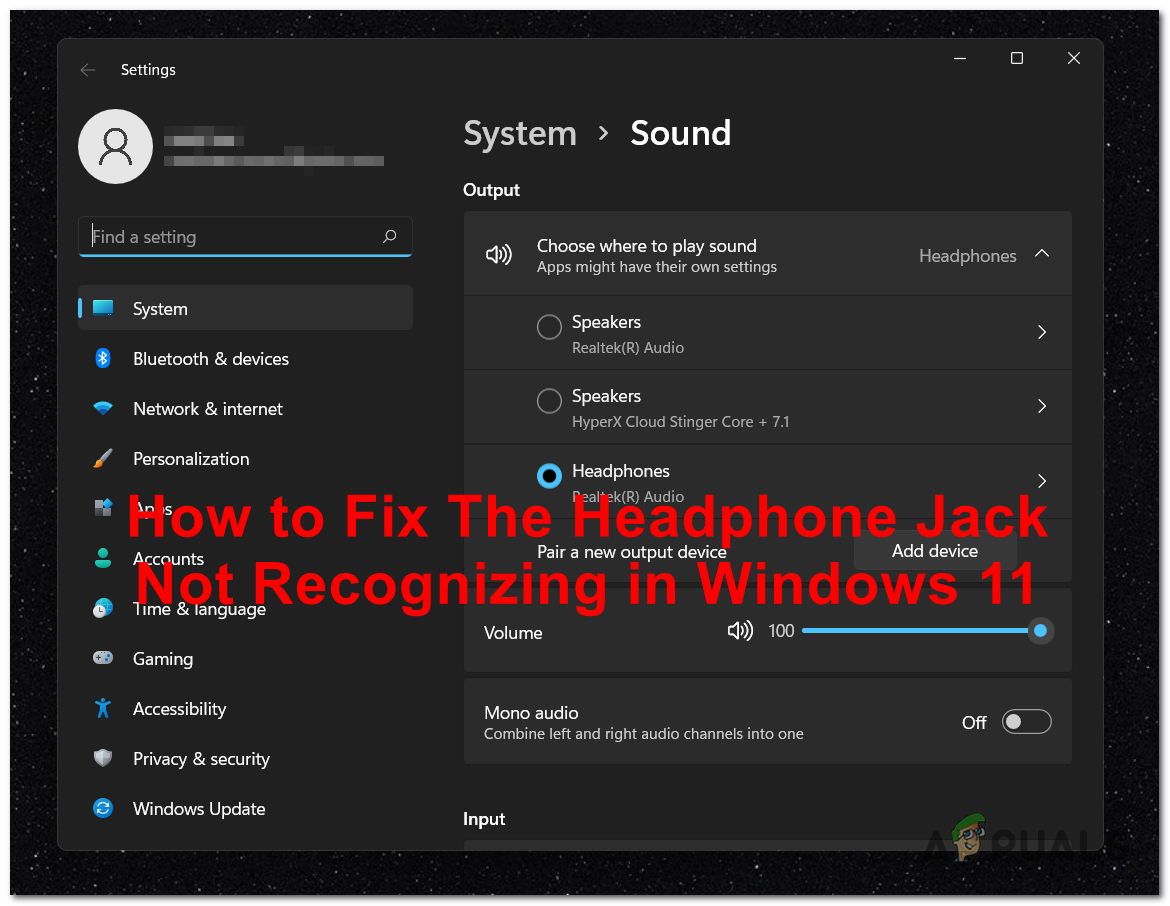
1. Reboot while the headset is connected
If you’re just beginning to troubleshoot the problem, you should first start by rebooting your PC while ensuring that the malfunctioning headset is connected to your PC. Keep in mind that things work differently on Windows 11 than on Windows 10. On Windows 11, the driver matching only happens immediately after the startup procedure (on Windows 10 this happens dynamically). If you were to disconnect your headset before plugging it back in, there will be no re-detection until you reboot your PC. So if you haven’t done this already, make sure that the unrecognized headset is connected to your PC before initiating a restart procedure. Wait until the next startup is complete and see if the problem is now fixed. Update: It turns out that this behavior is not an intended functionality and will be rectified by a future Windows 11 update. If your headset is still not getting recognized on Windows 11, move down to the next method below.
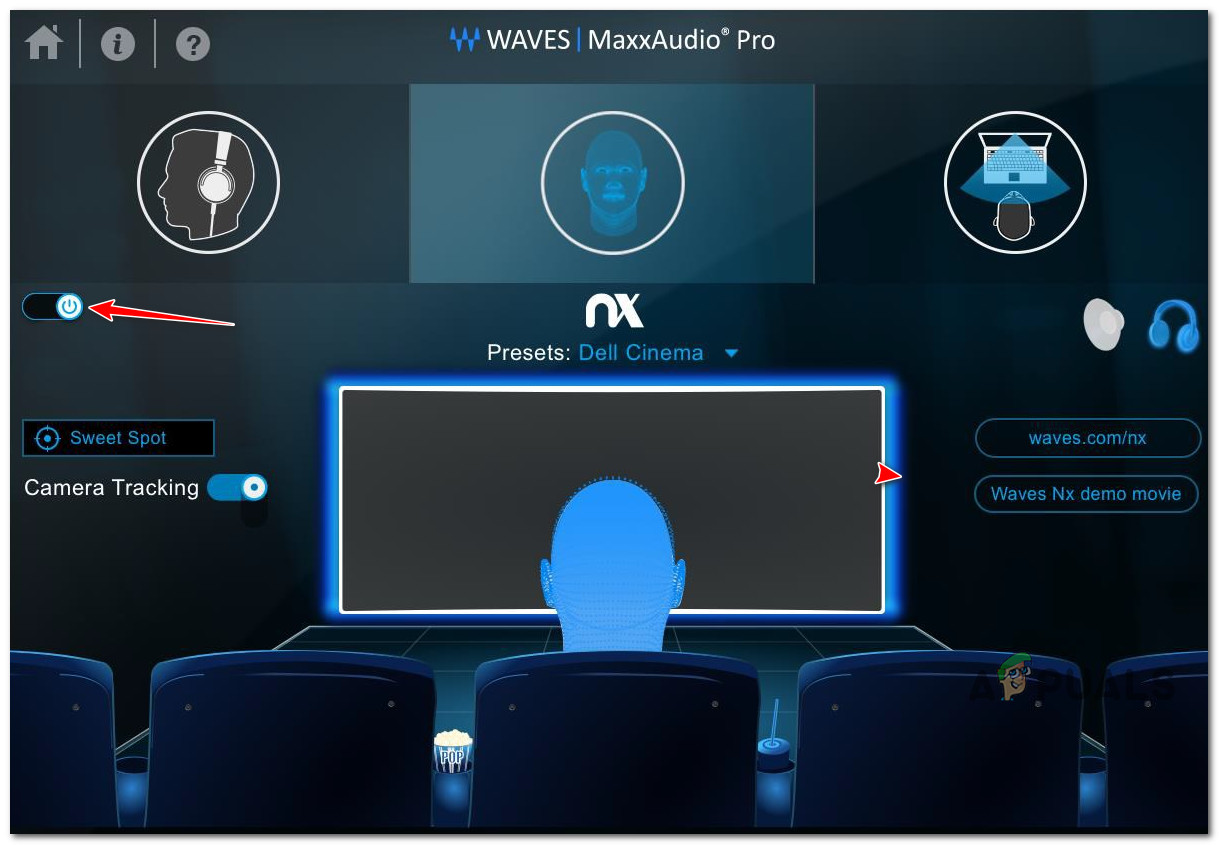
2. Override Maxx Audio PRO Settings (if applicable)
If you’re using the Waves MaxxAudio Pro packages on a Dell computer, it’s very likely that you’re experiencing this issue due to a software conflict between the generic Audio drivers and the set of dedicated equivalents that are being used by Maxx Audio Pro. If this scenario is applicable and you’re not too keen on giving up Maxx Audio Pro, the only workaround that seemed to work for a lot of affected users is to temporarily disable Max Audio before choosing your headset over headphones from the drop-down menu below. After you do this, you can disable MaxxAudio again and reboot your computer with the certainty that the settings will be kept. Follow the steps below for the complete instructions on fixing the MaxxAudioPro-generated inconsistency: If the problem is still not fixed, move down to the next method below.
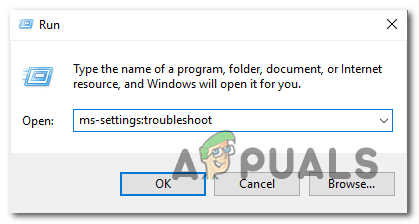
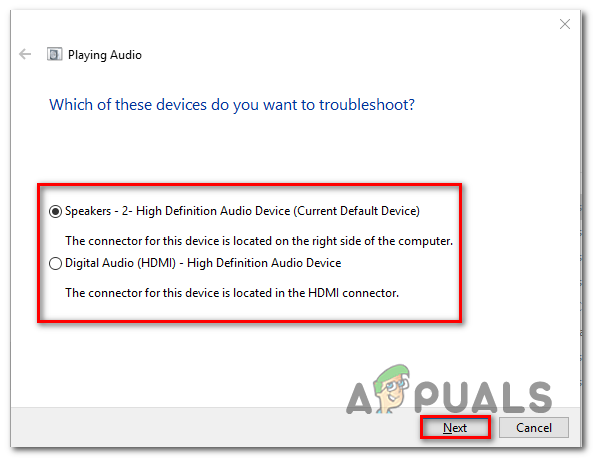
3. Run the ‘Playing Audio’ troubleshooter
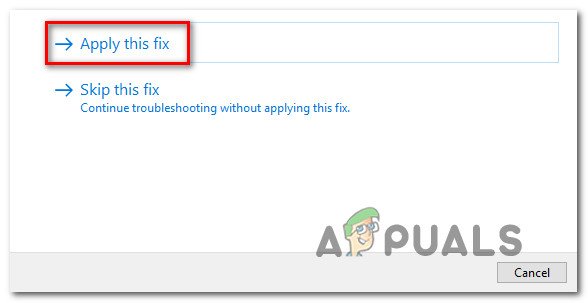
If the first two methods above didn’t work in your case, the next thing you should do if you’re still encountering this issue is to run the ‘Playing Audio troubleshooter’ and apply the recommended fix. This process can be done from the Windows Settings of your computer and is very easy to access and use. The Playing Audio troubleshooter will scan the audio devices of your computer that you want, and it will look for problems that might be preventing them from utilizing the headset that you’re currently having issues connecting to Windows 11. Note: This particular issue will most likely be effective in situations where this problem is rather occurring do an underlying system file-related glitch. If you haven’t tried running the ‘Playing Audio’ troubleshooter and applying the recommended fix yet, follow the instructions below: If the problem is still not fixed, move down to the next method below.
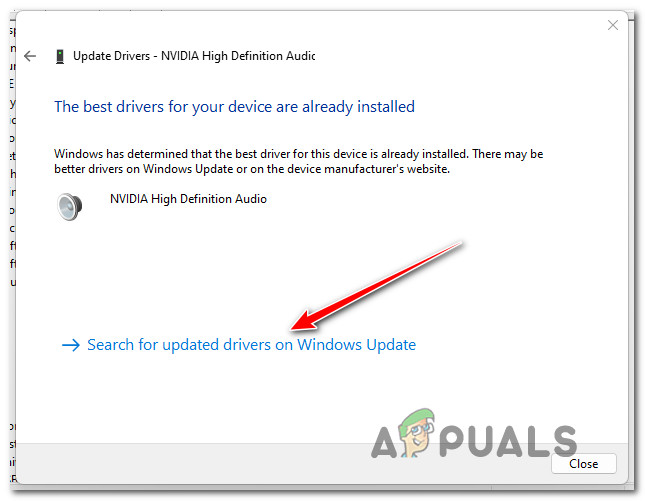
4. Update the audio driver
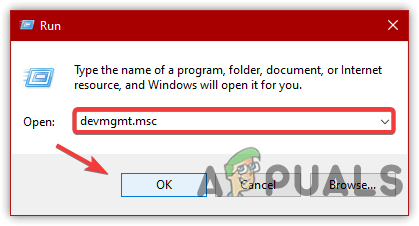
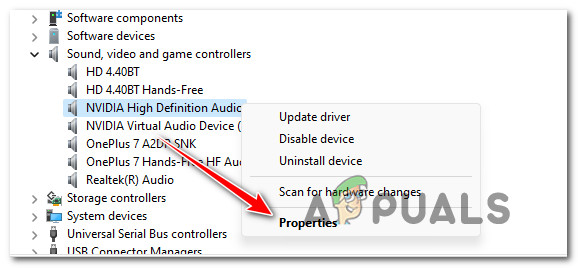
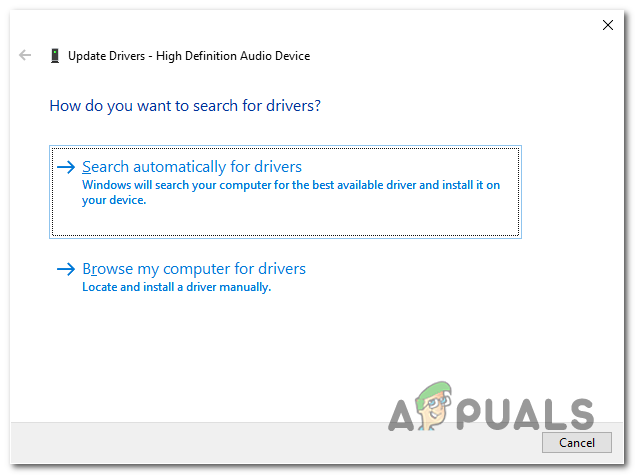
The next thing you should do is make sure that the audio driver you’re presently using is updated to the most recent version. This is a logical follow-up if the troubleshooter method above didn’t help your situation. In typical situations, a Windows Update subcomponent should automatically update and maintain this driver. However, there are times when an out-of-date audio driver that is incompatible with your current OS version leaves you helpless. It has been reported by many users that the issue was ultimately resolved when they utilized Device Manager to compel the High Definition Audio Device’s Properties page to update the driver. If this scenario is applicable, follow the instructions below: Continue to the next possible solution below if the same kind of issue is still present.
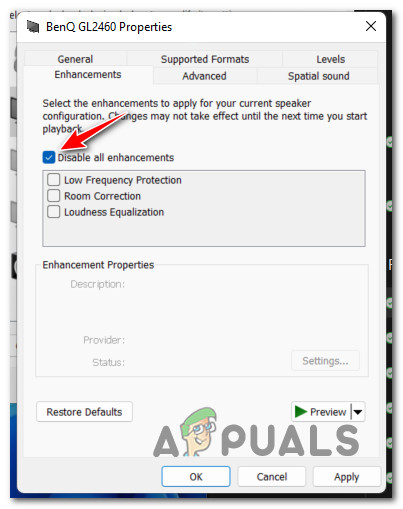
5. Disable software enhancements
The selection of Sound Enhancements that you most likely have enabled should be your next area of the investigation if you’ve gone this far without finding a workable solution. Numerous Windows 11 users who had been complaining about being unable to connect their headset have said that the problem had been remedied once they turned off all software-powered audio enhancements. When they turned off all audio improvements, the problem was resolved and they were able to connect their headset in a reliable manner (without having to reboot each time) The procedure listed below may be used to totally eliminate all enhancements from Sound Properties. IMPORTANT: A dedicated audio card will probably have its own audio enhancement settings if you’re utilizing one. In this case, deactivating them from the dedicated utility is recommended since doing so will not fix the problem. If you’re using SRS Premium Sound or SRS Premium Sound, uncheck the option next to Audio Enhancement in the dedicated app. If you want detailed instructions: If you’re still having the same issues even after you’ve disabled all software enhancements, then scroll down to the next possible solution below.
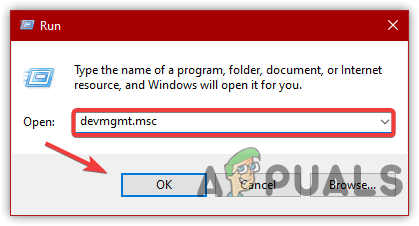
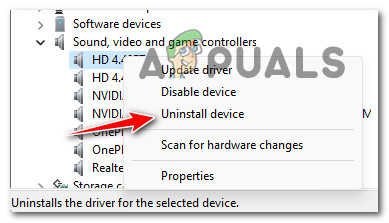
6. Manually uninstall the latest audio driver and reinstall it
If you’ve come this far without a viable fix, you should start considering a potential issue that’s rooted in some kind of corruption affecting the audio driver. This kind of issue is frequently encountered after upgrading from an earlier version of Windows to Windows 11. Depending on the upgrade path you took, it’s possible that your older Windows version’s audio driver was transferred over as well, rather than being replaced by an audio driver adapter for Windows 11. To get Windows 11 to upgrade your existing audio driver in this situation, you need to use Device Manager. Since you already tried updating your current driver and it didn’t work, the next thing you should do is uninstall it completely and see if your headset issues will disappear. Follow the instructions below: If the problem is still not fixed, move down to the next potential fix below.
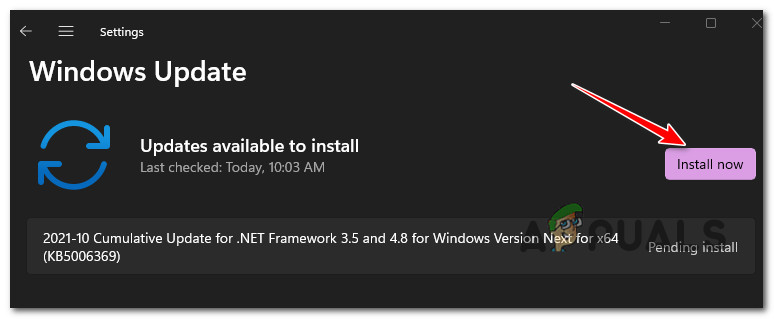
7. Update Windows build
Remember that this issue has been largely resolved by a Windows Update that Microsoft delivered at the beginning of March 2022, as several users have verified. If you have updated every cumulative Windows Update, you should no longer have sporadic headset disconnections and difficulties pairing with certain headset types, according to a few Microsoft specialists. You should enter the Windows Update component and manually verify that you are using the most recent version of Windows 11 to make sure this is relevant. The steps listed below should be followed in order to install the most recent Windows 11 updates: Continue to the last procedure below if your headset still won’t connect to your Windows 11 installation after you’ve verified that the most recent build is installed.
8. Perform a repair install or clean install
Suppose none of the previous solutions mentioned in this article have been able to help you resolve this problem. In that case, you should consider the likelihood that certain damaged sound dependencies are to blame for your inability to connect your headset. The best course of action at this point is to simply replace every system file with a counterpart that you know is healthy and unaffected by corruption since many system files in this instance suit the description of the perpetrator. There are two approaches that you may use to do this:
Clean install – If you’re searching for a fast remedy, try this. The main disadvantage of clean installing Windows is that, unless you have a backup of your data beforehand, the process will result in the deletion of every personal file and application that is currently kept on the same partition as your operating system. This is because clean installing Windows will let you replace every system file without the need to use compatible installation media.Repair install – If you have some spare time, we advise choosing an in-place repair rather than a repair install. Although this procedure is a little more laborious and calls for compatible Windows 11 installation disks, the main benefit is that all your personal files, games, and applications remain intact.
Fix: Headphone Jack not Working on Android PhoneiPad’s Next Generation Will Not Include 3.5mm Headphone JackFix: Front Audio Jack not WorkingFix: iPhone not recognized by Windows 10