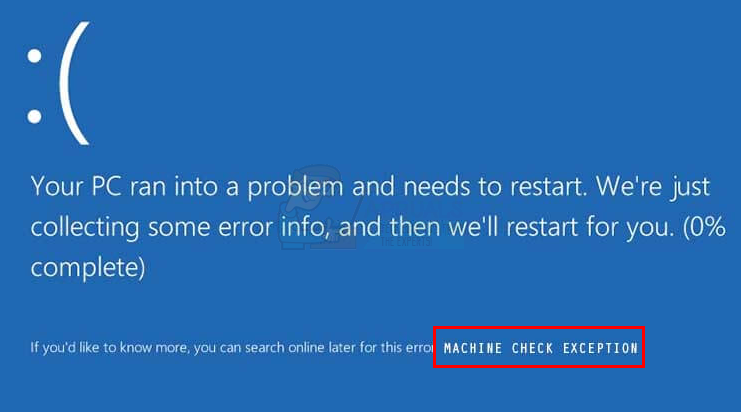
The good thing about BSODs is that most of these errors are caused by driver or hardware issues. So, if you recently updated your driver or installed a Windows Update or upgraded to newer version then these should be your first suspects. If updating the drivers or reverting back to the previous versions (in case the problem started after updating the driver) doesn’t solve the issue then the most likely cause is a hardware issue. A hardware issue should be your prime suspect if problem started after installing a new piece of hardware. There are other things as well that can cause this issue but we will address those later on. So, let’s first start with updating and fixing of drivers.
If you can’t get into the Windows
Since the BSOD can appear at the beginning of the Windows login, it is possible that you might not get enough time to follow any of the methods given below. We have seen cases where people couldn’t even get to the Windows login screen. So, if you are one of those users then you have two options. The first option is to use Safe Mode and perform the steps given in our methods. The second option is to get your important documents (backup) and reinstall the Windows. We have provided the steps for getting into the Safe Mode without logging in to your Windows. You will also find the steps to copy your important documents in case you want to reinstall the Windows. It is up to you whether you want to reinstall the Windows or try to fix the problem by going into the Safe Mode. Get into Safe Mode via Windows Login Screen The easiest way for you to get into the Safe Mode is via the Windows Login screen. If you can’t even get to the Windows login screen then move to the next section
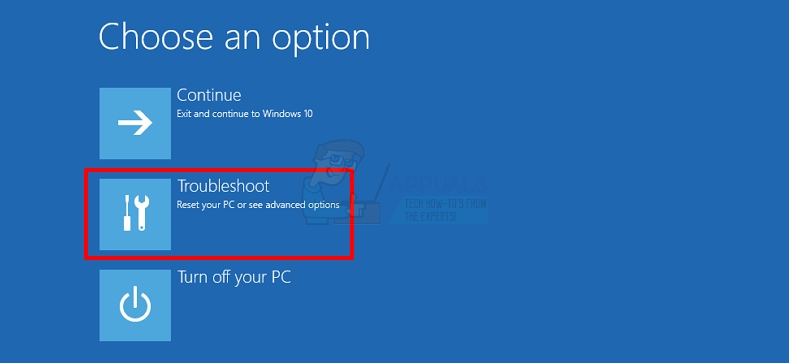
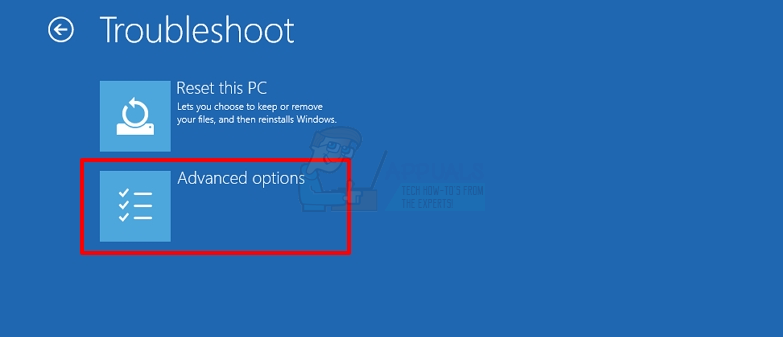
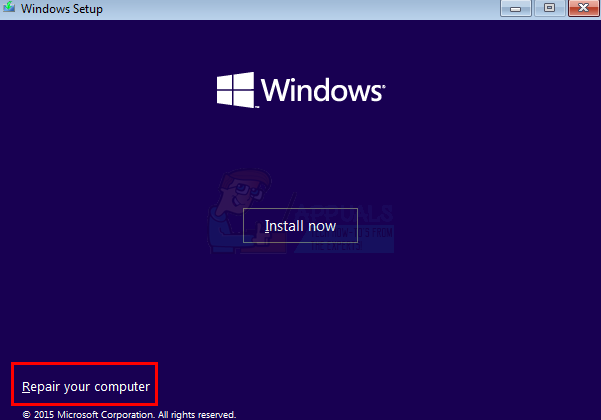
That’s it, if you do it correctly, your system should start in the Safe Mode Get into Safe Mode with Windows Installation Media You can use Windows Installation Media or CD/DVD to get into the Safe Mode. Follow the steps given below. Now, you need to use the USB to repair your problematic PC. You will have to boot via the USB and you need to have the proper boot order for that. If you don’t know how to change the boot order then follow the steps given below Setting the Boot Order is the first thing that you will have to do. Basically, the Boot Order defines the order in which the drives will be checked for operating system information. In most cases, your Hard Drive is at the top of the Boot Order mainly because it contains your operating system. Now, since our USB contains the Windows Installation files, we want the USB to be at the top order so our computer reads from the USB Flash Drive first. Once your system is booted via the USB Flash Drive, you should see a Windows Installation screen.
That’s it. Once you are done, your system should be in the Safe Mode and your BSOD shouldn’t appear anymore. This will also confirm that the BSOD was caused by one of your drivers.
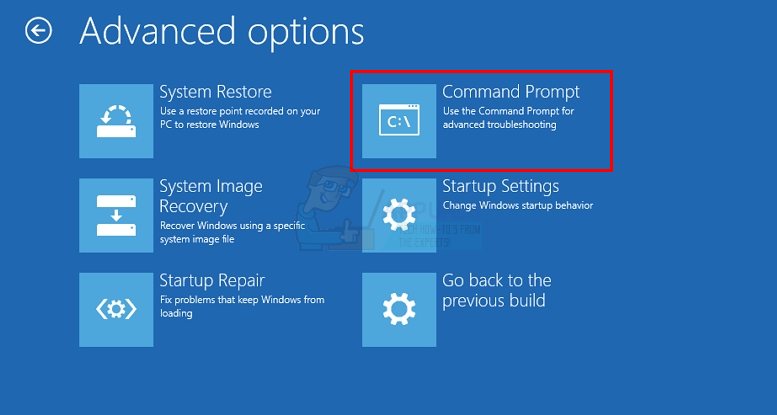
Use Command Prompt to Back up your Data
If you can’t access your Windows and you want to back up your data before reinstalling the Windows then follow the steps given below
Once done, you can reboot
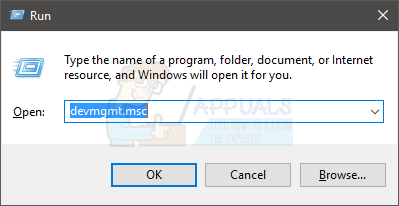
Method 1: Fix the Driver
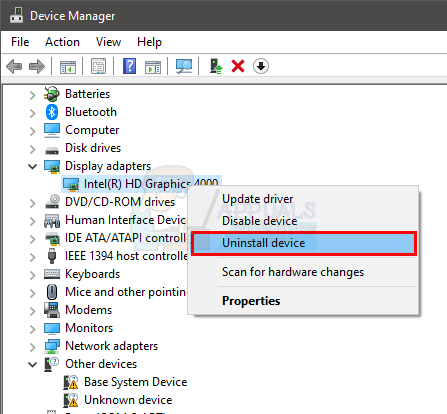
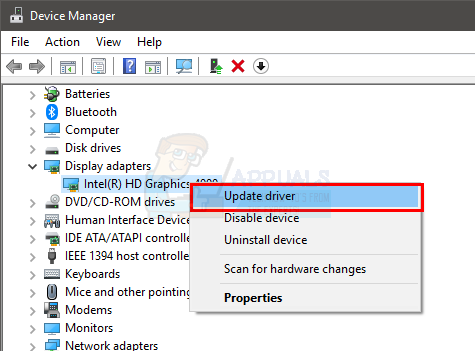
Sometimes, the problem might be happening because of the drivers. Now, there are multiples things that you can do with the drivers depending on whether you recently installed a driver or not. If you have recently installed or updated a driver or installed a new hardware (and downloaded its driver) then you should try to uninstall that specific driver. If you updated the driver then you should try to revert back to the previous driver. Note: Since we don’t know what type of driver you might have installed, we are showing you the steps for uninstalling the display driver. You should uninstall your specific driver (select your targeted driver at step 3 below). Uninstall
Restart your PC once the driver is uninstalled. The Windows will install the most suitable and latest driver when your system will start again.
Roll Back Driver
If you recently updated your driver then you should roll back to the previous version. Windows provide a very useful option that lets you revert back to the previous version of the driver. Follow the steps given below
Note: If your Roll Back Driver button is greyed out then that means you can’t roll back the driver. There aren’t any workarounds to this so just simple move to the next section
Update
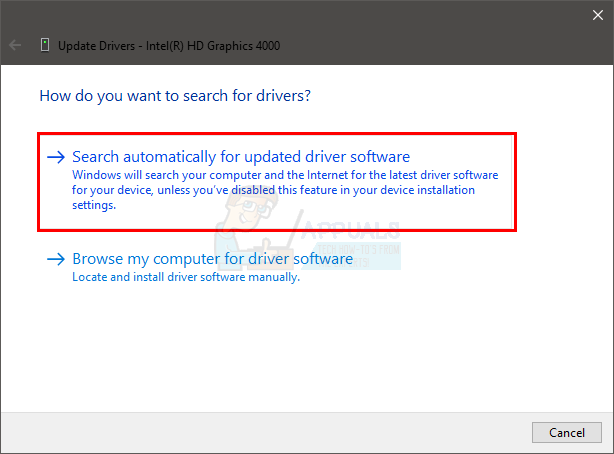
Now, if you didn’t install any new driver or updated any driver then your problem might be completely opposite. In some cases, this error can be caused by outdated drivers. So, if you recently upgraded your Windows or installed a new hardware then your old driver might not be compatible. So, simply updating the driver will resolve the issue. In fact, you should update the drivers even if you didn’t install a new hardware or upgraded to a newer version of Windows. The BSOD can be caused by any type of driver but the most likely culprit are Display drivers, Wi-Fi Drivers, USB drivers, and drivers for your newly installed hardware. Note: Do not use third party driver updating utilities.
Now wait for the system to search for the updated driver. If your PC finds an updated version of your driver then it will automatically install it.
Manual Installation
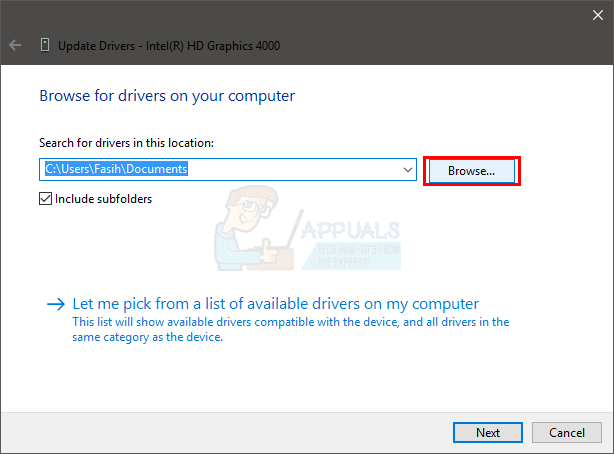
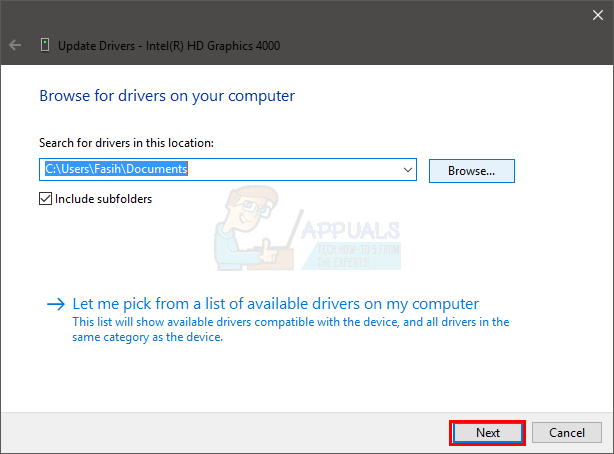
If the automatic search for drivers doesn’t work then you can always do a manual install of the drivers. In order to manually install the drivers, you will have to download the drivers from your manufacturer’s website first. You can do this from your own PC or you can use another PC and copy the downloaded drivers on your problematic PC. The complete step by step guide is given below
Now follow any addition on screen instructions and reboot your computer when the driver is installed. This should fix the audio driver issue for you. Check if the issue persists once you are done with uninstall/updates.
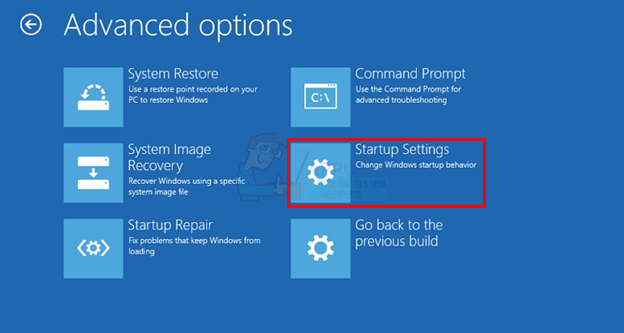
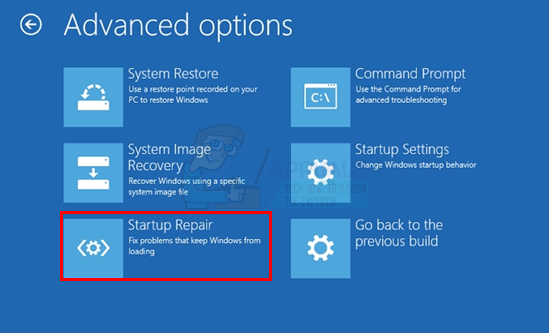
Method 2: Startup Repair
Performing a startup repair has worked for a lot of users. Startup Repair is a Windows feature that fixes the Windows issues and fixes any damaged system files. You can initiate the startup repair from the Recovery Environment. The steps for initiating the Startup Repair are given below
The startup repair should fix the issue for you.
Method 3: Clear CMOS
CMOS Battery is a Non-Volatile RAM which simply means that it retains the information even after your computer is turned off. A lot of users resolved their issue by taking out the CMOS Battery and putting it back in. There are two ways to clear the CMOS battery. You can either use the BIOS or clear the CMOS through hardware approach. We will cover both in this section.
Clear CMOS via BIOS
Follow these steps to clear the CMOS from your BIOS menu Note: The steps given below will reset your settings to the default. So, if you made some changes in the BIOS, you will have to change these back once you are done with clearing the CMOS. Now, restart your computer and check whether the error is still there or not. Clear the CMOS via Motherboard This is the hardware approach of clearing CMOS battery. This is generally useful when you can’t access the BIOS. We will recommend you to follow the instructions in the above Clear CMOS via BIOS section mainly because this section requires a bit of technical knowledge. So, here are the steps to clear CMOS battery Note: If you don’t feel confident then either use the computer manual or contact a computer expert. Once you are done with these steps, simply close the closing of your system and turn on the computer. Everything should be fine.
Fix: System Service Exception VirtualBox BSOD on Host MachineHow to Fix Unknown Software Exception (0xc06d007e)Fix: Windows Store Crash Exception Code 0xc000027b[FIX] Error 42102 Exception in Macro Viruses Code