If you are experiencing high CPU usage from Windows Image Acquisition, it probably means there are either some problems with your imaging hardware or some modules in your computer are misconfigured. This condition of high CPU usage is usually subdued without much effort.
What causes high CPU usage by Windows Image Acquisition?
There are very straightforward reasons why you might experience the high CPU usage of Windows Image Acquisition. Listed below are the reasons because of which majority of the users face the problem:
Misconfiguration of Windows Image Acquisition API. If there are wrong parameters or the service is stuck at a specific point, you might experience high CPU usage.The printer or scanner which you have connected to the system might be in an error state or there might be pending jobs which aren’t getting through.The module of Windows Image Acquisition is corrupt and hence is going into an error condition again and again. Usually, this happens in very rare cases.
How to fix High CPU usage by Windows Image Acquisition?
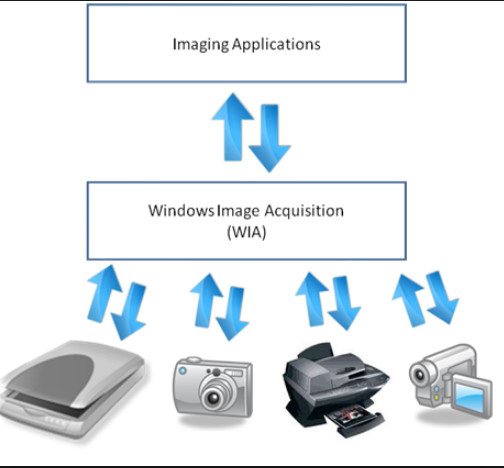
Majority of the users who reported this problem were running Windows 10 on their machines. This CPU usage is mostly associated with the service running in the background to handle all graphics related tasks from external hardware. In addition to high CPU usage, users have also reported that they face high Disk usage because of the service. The solutions below will solve all the problems listed.
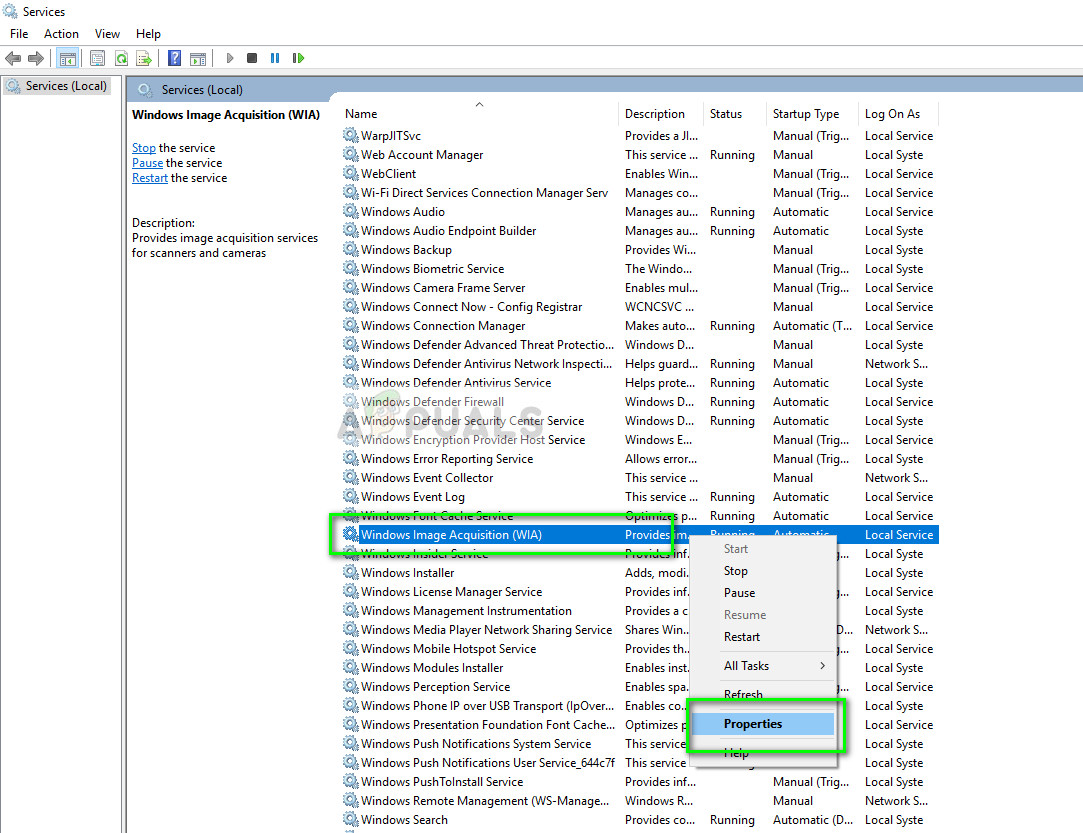
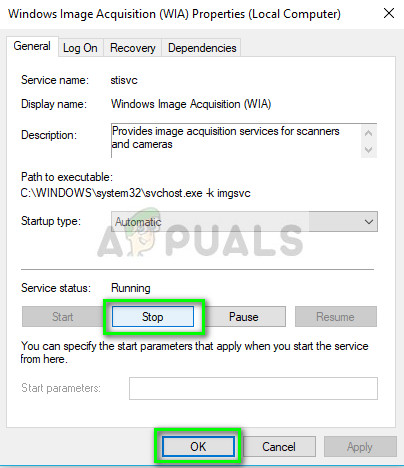
Solution 1: Restarting Windows Image Acquisition
The simplest fix which works for the majority of the users is restarting Windows Image Acquisition service. If restarting the service doesn’t work, you can try killing it. Although it might provide hindrance when using the imaging hardware connected to your computer, we will be able to diagnose whether the problem is related to your OS or the hardware connected.
Solution 2: Checking your Imaging hardware
Another solution to stop the high CPU/Disk usage due to Windows Image Acquisition is checking your imaging hardware and all the pending jobs. The imaging hardware includes but is not limited to printers, scanners, cameras, etc. You should disconnect your imaging hardware and restart it. When plugging it back in, make sure that you follow solution 1 to restart the service.
You can also try canceling all existing jobs which are pending. There is usually an icon present at your taskbar regarding all the pending jobs. Click it and delete all the jobs. Restart your computer properly and check if the high CPU/Disk usage went away.
Solution 3: Repairing system files
If both the above methods don’t work, it probably means that your system files are corrupt and because of them, the service Windows Image Acquisition is going all hyped up. You should try running the following command in an elevated command prompt (windows + S, type ‘command prompt’, right-click and select ‘Run as administrator’) to fix any registry corruptions or missing files. In addition to the above command, if the service gets out of control and your computer is unusable, you should consider installing a fresh version of Windows on your computer.
Fix: Kernel Auto Boost Lock Acquisition with Raised IRQLSony Believes Microsoft’s Acquisition of Activision Could Lead to Loss of…U.K.’s Competition Regulators Could Further Expand Investigation in Microsoft’s…NVIDIA’s $40 Billion Acquisition of ARM Fails, Preparation Underway To Abandon…