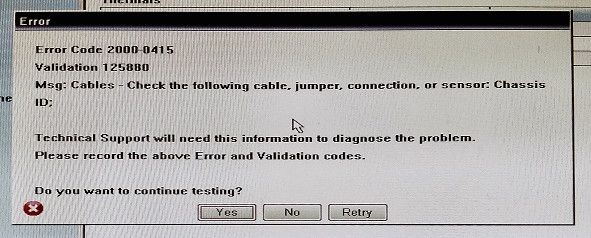
After we analyzed every potential scenario that might be triggering this error code, here’s a list of scenarios that are known to cause the 2000-0415 when running the EPSA tool on a Dell computer: Now that you are familiar with every scenario that might cause the 2000-0415, move down to the next section below for instructions on resolving this particular issue.
1. Connect the A/C Power Adapter (if applicable)
By far, the most common instance that will produce this error is a scenario in which the A/C power adaptor is not connected to the machine that is performing the ePSA scan. Keep in mind that the Enhanced Pre-Boot System Assessment scan will execute a complete verification of every involved hardware component – This includes the assessment of voltages and frequencies of crucial components such as the CPU, GPU, and memory. Note: This is only applicable for Dell devices that have a built-in or detachable battery (laptops, ultrabooks, Windows Tablets, etc.). One of the reasons why the voltage or frequency values are different than the expected equivalents is if the Dell device currently draws power from the battery instead of drawing it directly from a power outlet. If this scenario is applicable, this will likely mean that the frequencies of your hardware components are lower than expected, which might determine the ePSA tool to throw the 2000-0415 due to concerns of a hardware failure. Fortunately, you can prevent the error from occurring simply by connecting the Del device to the power adaptor and repeating the ePSA scan. In case connecting the Dell power adaptor didn’t resolve the issue or this scenario is not applicable, move down to the next potential fix below.
2. Check for an Unconnected Cable
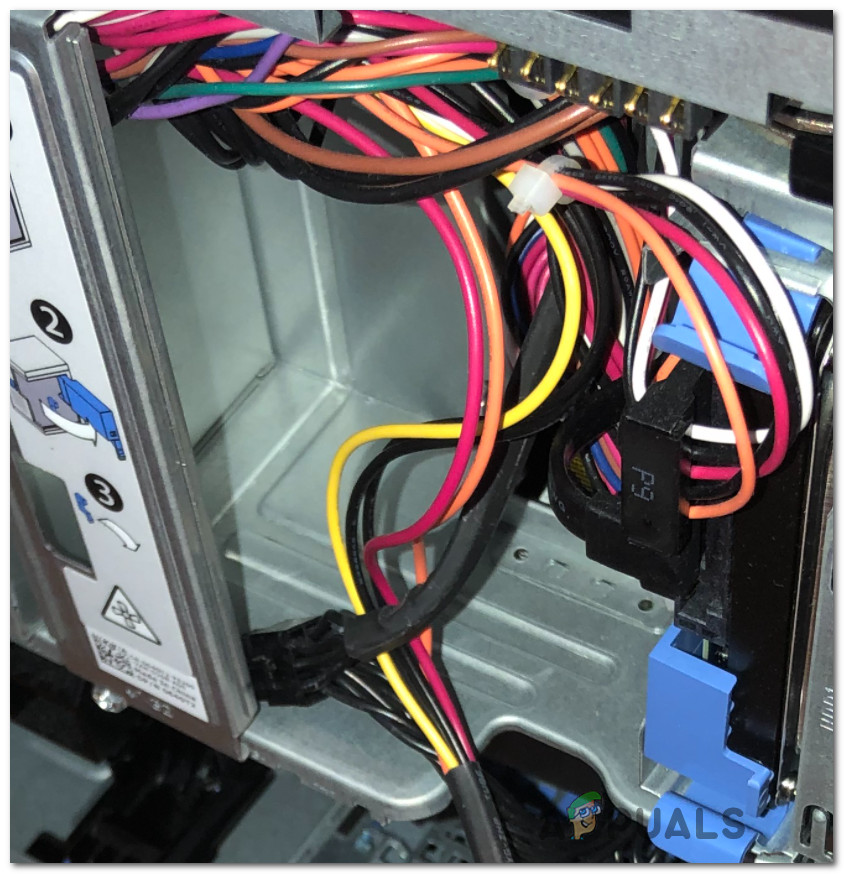
If you only started dealing with this issue after taking your computer to a PC technician or after making some changes (component-wise), you should check either every cable is correctly connected. Keep in mind that the 2000-0415 error can also be a symptom of a component that doesn’t have a power cable connected to it – The most common culprits, in this case, are SATA or ATA cables that are disconnected from the HDD / SSD. To make sure this scenario is not applicable, shut down your computer completely and disconnect it from a power source before opening the back case. Note: If you have a static wristband at your disposal, equip yourself with it before proceeding any further to mitigate the risk of damaging your internals due to static electricity accumulation. Once you are inside, take a look at your components and see if every cable is correctly connected. Note: Make sure to push every cable through to ensure it’s not loosely connected. In case you manage to find a disconnected or loosely connected cable, rectify the issue and repeat the ePSA scan after you put the side/back case back on and reconnect the power cable. If this scenario was not applicable or every cable you investigated was correctly connected, move down to the next potential fix below.
3. Clear the CMOS Battery
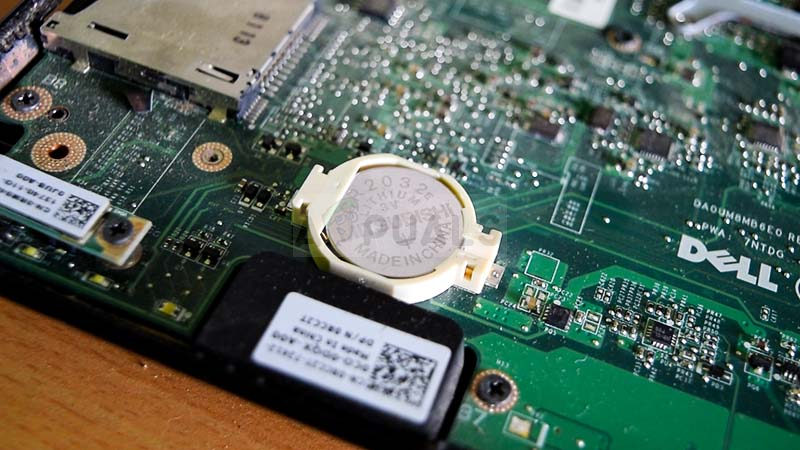
You can also encounter this issue due to remnant information left behind from a previous PC configuration that is confusing the ePSA scan – This is very common in situations where the CPU or GPU was replaced. In this case, you can make your PC ‘forget’ about the previous config by removing the CMOS battery from its socket. The CMOS (Complementary Metal Oxide Semiconductor) battery (also known as RTC or NVRAM) is responsible for storing information ranging from time and date to system hardware settings. If you suspect that this issue is being perpetuated by the CMOS battery, you should be able to fix the issue by clearing the CMOS battery by opening your PC case and physically taking it out for a couple of seconds. Here’s a quick guide on doing this: Note: The steps below should be applicable regardless of your Windows version or your PC configuration. Note: If you have a spare CMOS battery laying around, replace the current one to ensure that you’re not dealing with a faulty battery. If you don’t, clean it thoroughly to ensure that there’s no dirt inhibiting the connectivity with the motherboard. After you have successfully cleared the CMOS battery, put everything back together and initiate another ePSA scan to see if the problem is now fixed.
How to Fix DELL Diagnostic Error 2000-0142Fixing An Error Occurred during Port Configuration on Windows 10Fixing the Starbound ‘NetworkException’ ErrorHow to Fix Error Code 2000-0146