One such feature is the ability to add audio to powerpoint slides. While it remains an easy thing to do on Microsoft PowerPoint, it can be notoriously hard to add audio to your presentation using Google Slides. It would be great to have this feature on Google Slides directly, but while it’s not here, there are workarounds. As Chromebook users, we know – there are always workarounds. In this case, the workaround is simple. Google Sheets may not have support for audio files, but it works like a charm with Youtube or Google Drive. All we have to do is upload the audio file as a youtube video, hide the youtube video in the slide, and autoplay. Here’s a more detailed breakdown on how to go about this –
Convert Audio File to Video
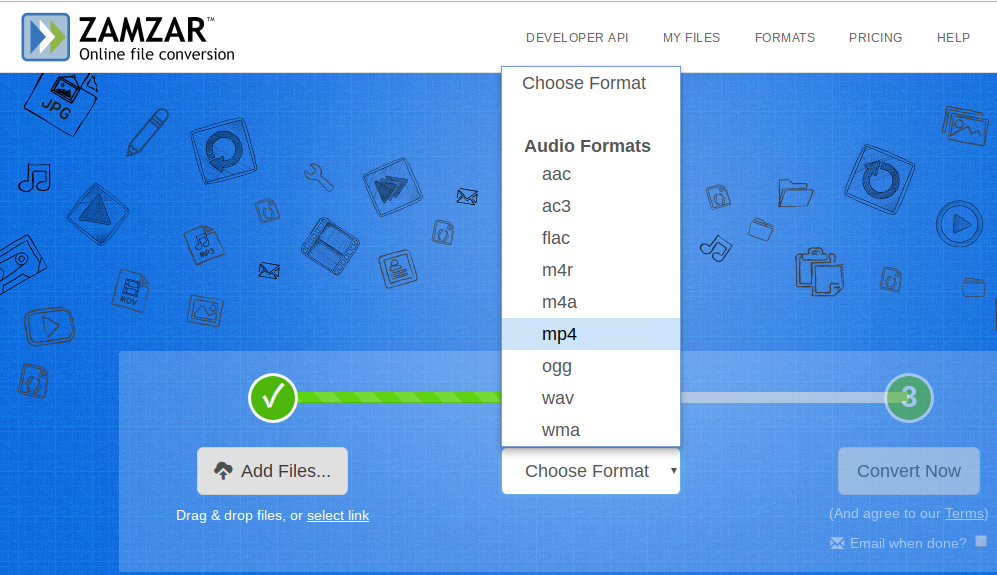
In case your audio file is already available on Youtube as a video, skip this step. If its not, all you need to do is add an audio file to any video editor and render it as an MP4. Audacity can also be used for the task. In case you’re on a Chromebook, you can use an online service like Zamzar, although it’ll be slower than the other offline alternatives. In the example above, I’ve used Zamzar. When you add your mp3 file, it suggests conversion options, and you can just pick mp4. A video file will then be rendered with your audio and a black background, which won’t matter because we’ll hide the video anyway.
Upload Video File and Add it to Slides
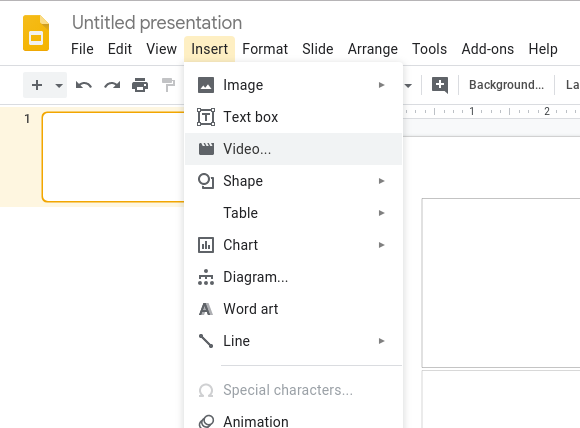
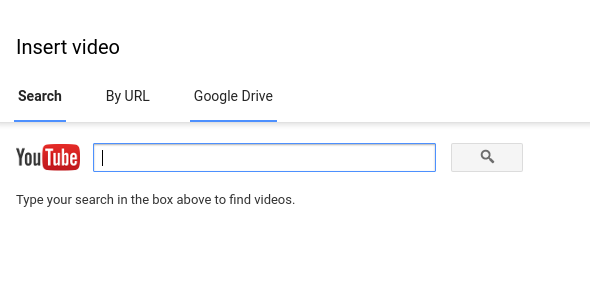
We can also upload the video to Youtube, but Google Drive comes recommended because there’s no chance of ads playing before the video via Drive. We definitely don’t want that to happen in the middle of our presentation. Once the file is uploaded, we have to add it to Slides. In order to do that, go to Insert > Video. The pop-up window will have three options – 1) Search on Youtube, 2) A Youtube URL and 3) from Google Drive. Depending on where you uploaded the video, select the corresponding option and add the video. If its on Drive, it’ll show up on the pop-up itself. For Youtube, you will have to manually add the URL of your uploaded video.
Hide The Video in Slides
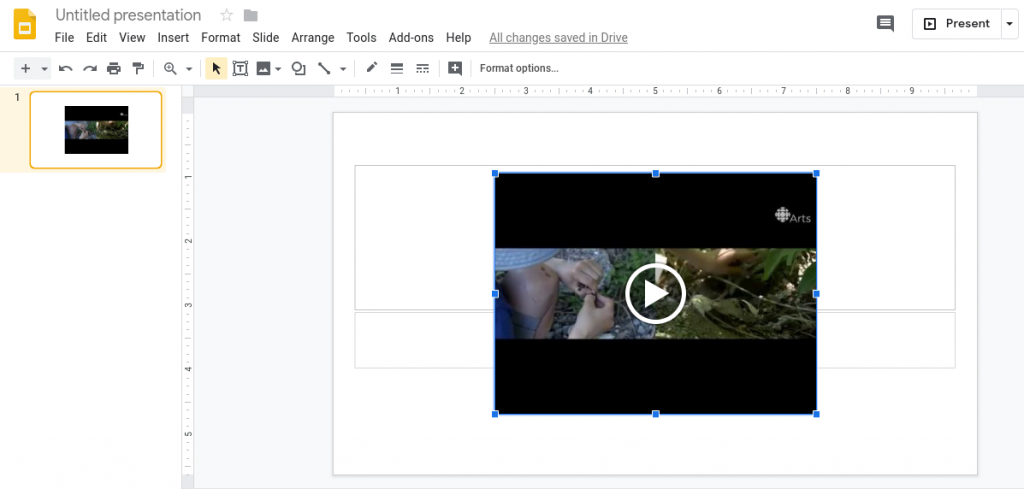
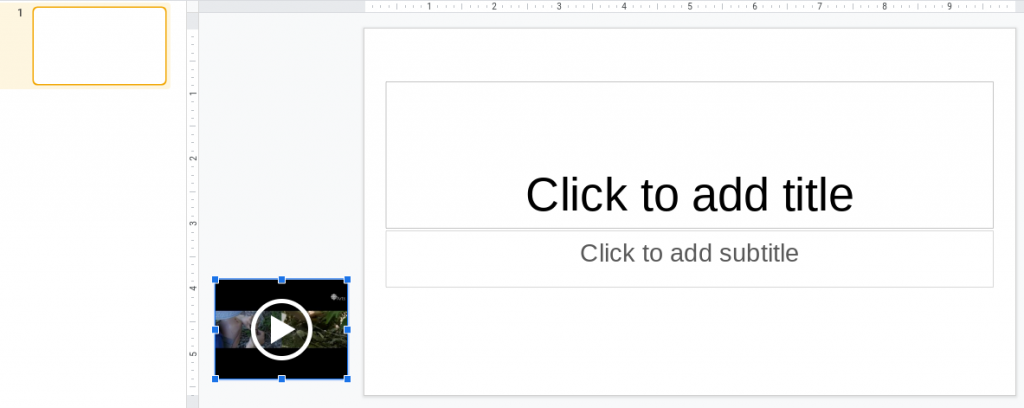
Once the video file is embedded onto your slide, it’ll look like this – But you probably don’t want the embedded video file to appear in your slide. What you can do to hide it is simply resize it like you’d resize an image, and drag it out of the slide. The end result should look like this –
Set Video to Auto-Play
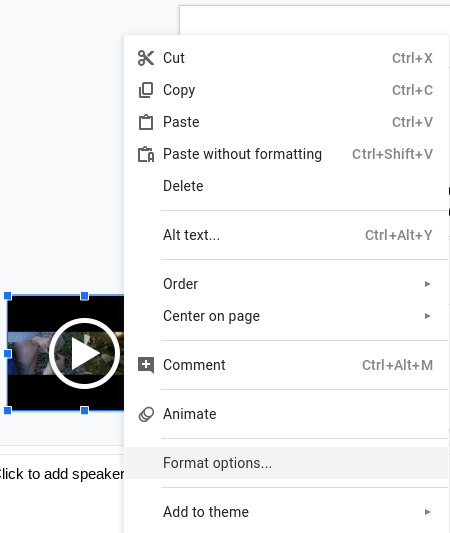
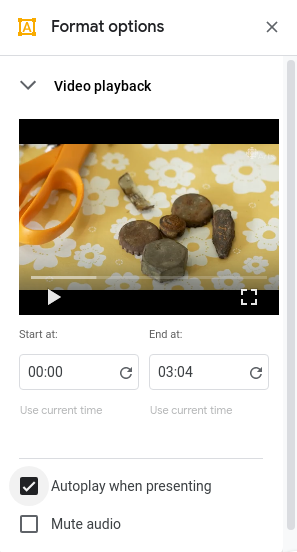
Now, in order for our little trick to work flawlessly, we need the video to autoplay when we reach our particular slide. On the presentation, then, it’ll look like the audio is perfectly in sync with the content, and you won’t have to press a button. In order to set this up, left click on the embedded video, and select Format Options. Under Format Options, click on Video Playback to open this dropdown. We now want to check ‘Autoplay when presenting’. If you want to start or stop the audio at a specific timestamp, you can add those here too. And that’s it. As long as you have a good internet connection while presenting, your audio will play seamlessly as you present your slides. This workaround is a bit lengthy, so we can only wish that Google gives us the option to upload an audio file directly. As long as it doesn’t, though, this is a useful trick to have up your sleeve.
How to Save an Image from Google SlidesHow to Add Music or Audio to PowerPointHow to determine true audio quality of streaming audioFix: Realtek Audio Manager won’t Open or Cannot find Realtek Audio Manager