How to set up the apparatus and automate it through Raspberry Pi?
The purpose of this technique is to make a system, as effective as the systems available in the market, with comparatively low cost. Go through the steps below to automate your sprinkler control through the raspberry pi.
Step 1: Collecting the Materials
According to the measurements of your garden, gather the exact quantity of pipes, different adapters and electronic components that will combine together with Raspberry Pi to form the whole system.
Step 2: Planning
The best approach is to make a full plan in advance because it is a difficult task to undo the mistakes somewhere between implementing the whole system. It is important to note the difference between NPT and MHT adapters. Ensure that you install the drain valve at the absolute bottom of the framework. A sample system diagram is given below.
Step 3: Dig Trenches and Lay Pipeline
Before digging the trench, check if there is something else that is buried under the soil and dig deep enough so that you can lay a pipe and cover it with some soil. Bury the pipes and connect them with various connectors mentioned above. Don’t forget to install a drain valve.
Step 4: Put Solenoid Valve in Plastic Box and Connect to the Whole System
Screw NPT-slip adapters into both ends of the solenoid valve. Then drill two holes in the plastic box wide enough to pass a pipe through them to the slip adaptors inside the box and apply silicone adhesives on the joints to make the connections strong. Now, an important thing here is to observe the direction of flow on the check valve correct. The arrow should be pointing towards the solenoid valve.
Step 5: Attach Solenoid Valve Wire
Cut two segments of hookup wire and pass it through the box by drilling appropriate holes and connect it to the solenoid valve with the help of waterproof connectors. Use silicon to seal around the holes. These wires will be connected in the next step.
Step 6: Check for Leakes
Before you go any more remote, you presumably need to check your pipes for leaks. Fortunately, you can do it before connecting the circuit or even the Raspberry Pi. For this, connect the two solenoid valve wires directly to the 12V adapter. This will open the valve and allow the water to flow into the pipes. As soon as the water starts flowing, examine the pipes and joints carefully and check for leaks.
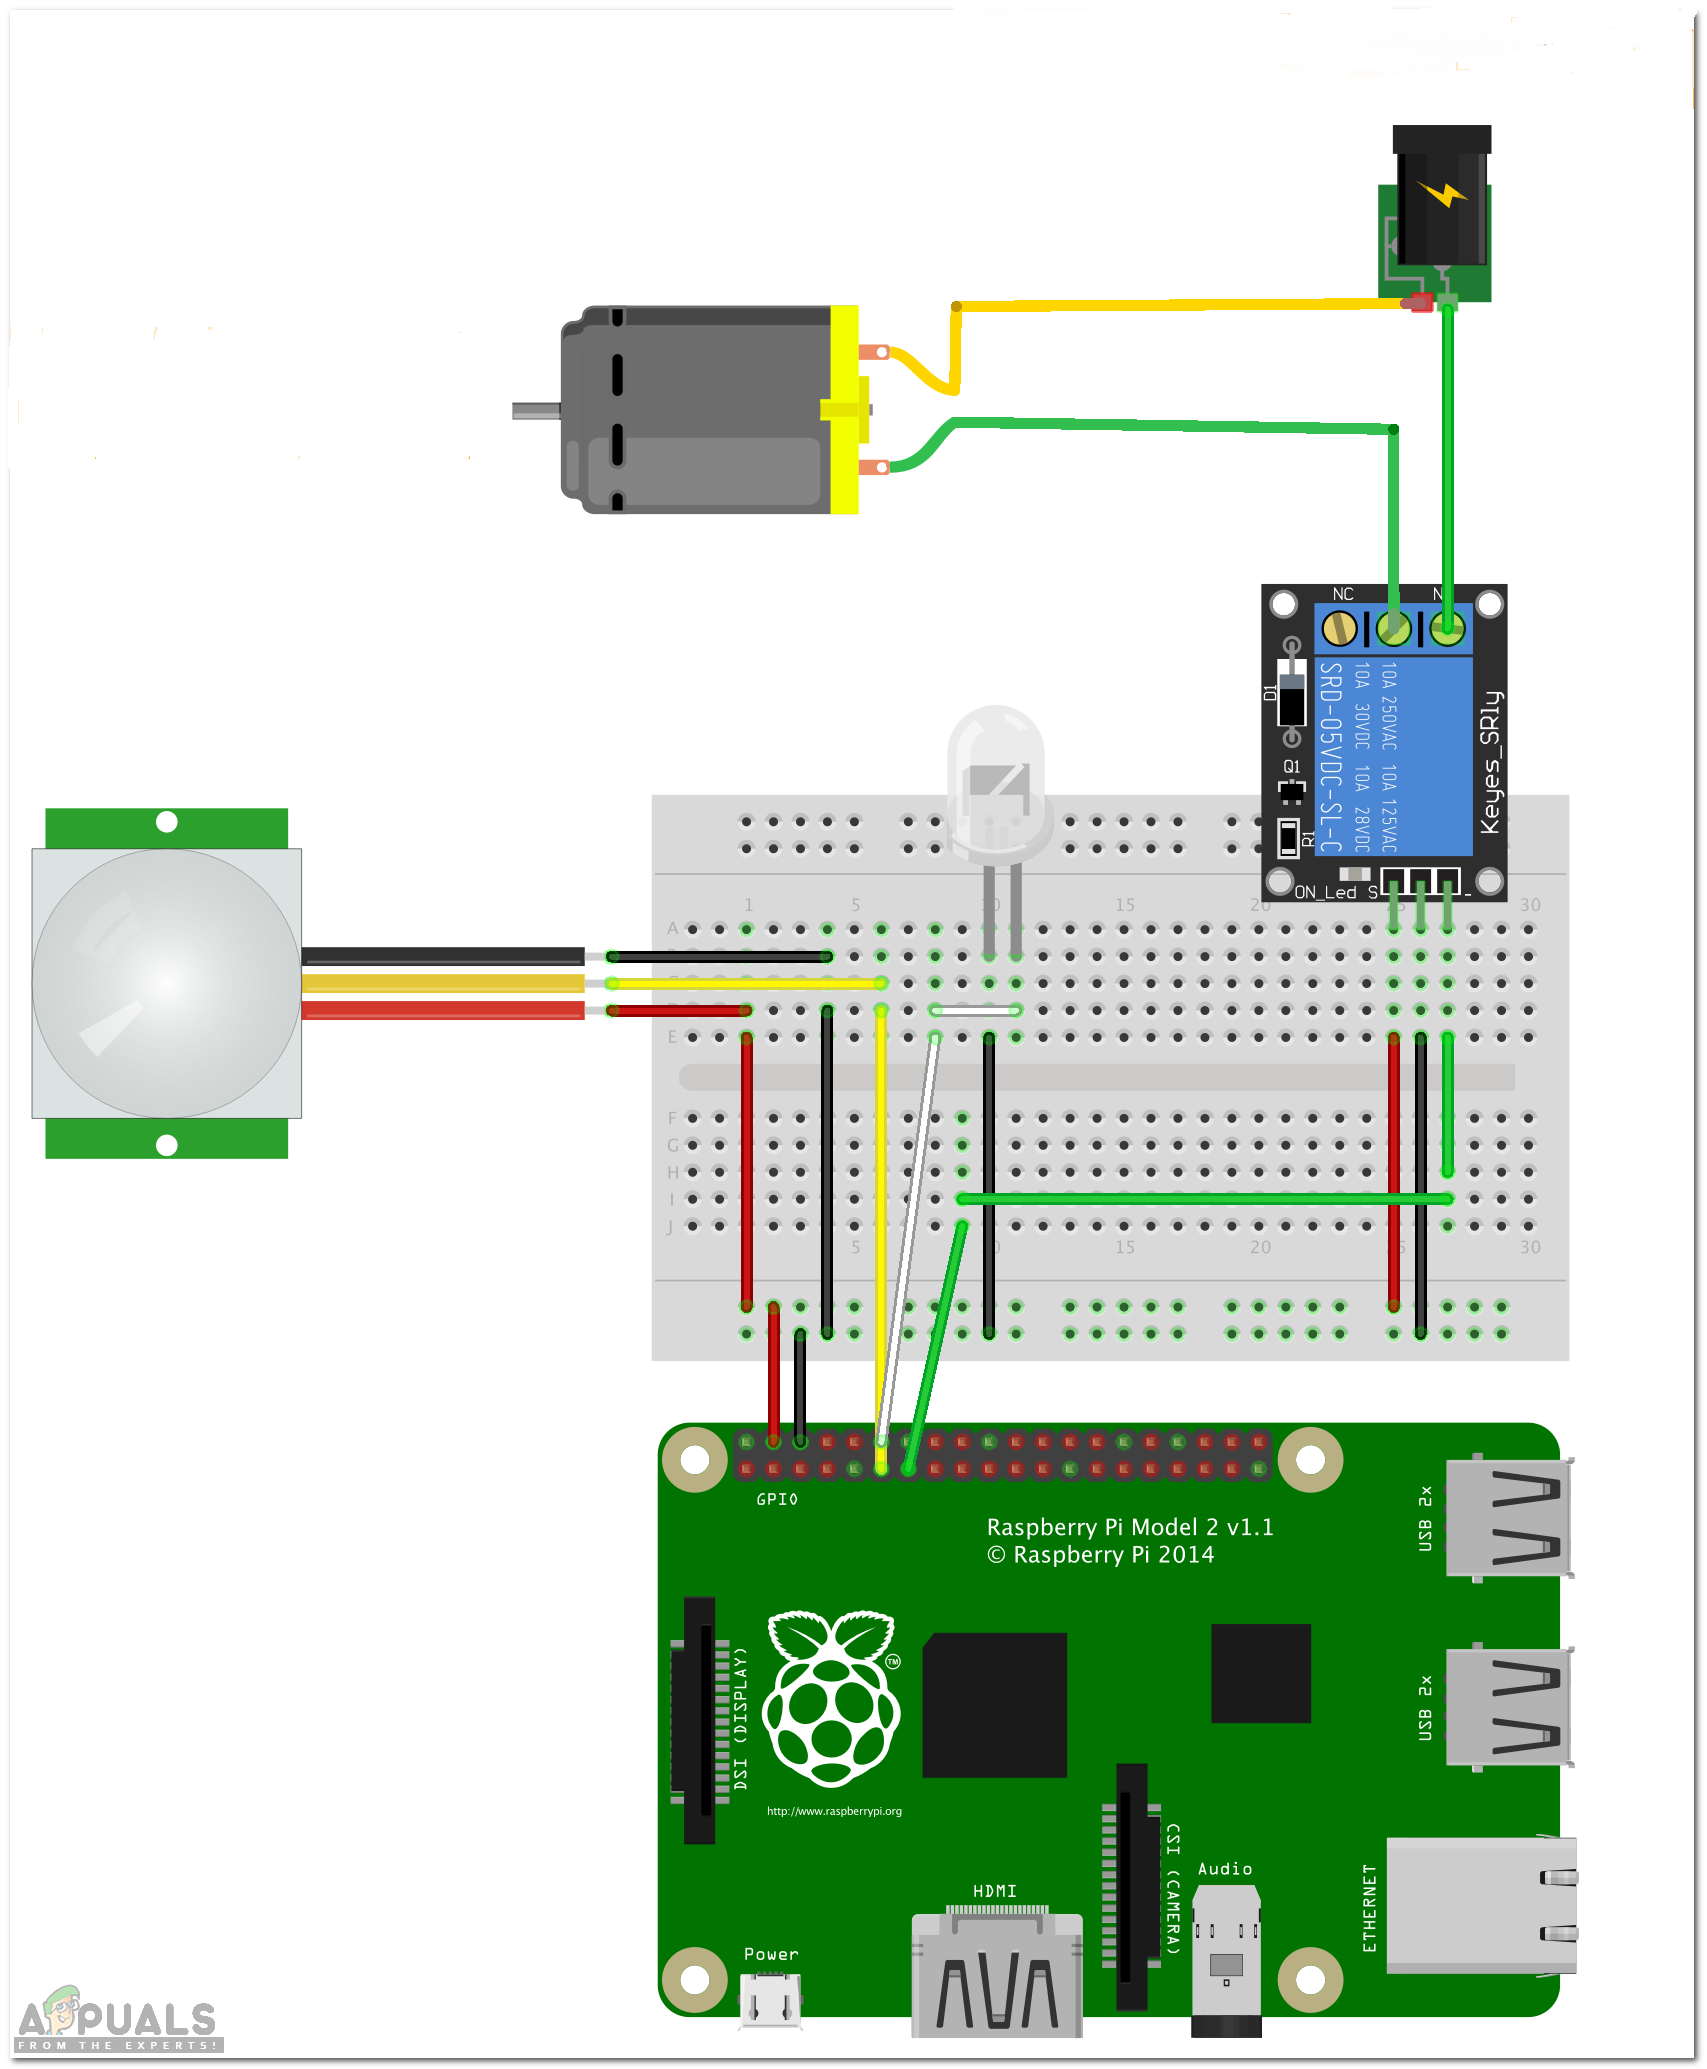
Step 7: Circuit
The image below shows the circuitry integrated with raspberry pi that will make the whole system work. The relay is working as a switch to control 24VAC power to the solenoid valve. As the relay requires 5V to operate and the GPIO pins can only provide 3.3V, Raspberry Pi will drive a MOSFET which will switch the relay which will turn the solenoid valve on or off. If the GPIO is is off, the relay will be open and the solenoid valve will be closed. When a high signal comes to the GPIO pin, the relay will be switched to closed and the solenoid valve will open. 3 status LEDs are also connected to GPIO 17,27 and 22 which will show that if the Pi is getting power and if the Relay is switched on or off.
Step 8: Testing Circuit
Before the whole system is implemented, it is better to test it on the command line using python. To test the circuit, Power up the Raspberry Pi and type the following commands in Python. This will initialize the GPIO pins 17,27 and 22 as output. This will turn the other two LEDs on. When you type the above command, the relay will produce a “click” sound which shows that it is closed now. Now, type the following command to open the relay. The “Click” sound that the relay produces shows that everything is going good so far.
Step 9: Code
Now as everything is going so good so far, upload the code on Raspberry Pi. This code will automatically check the rainfall update of the past 24 hours and automate the Sparkling system. The code is properly commented, but still, it is explained generally below: Download Link: Download Download the file attached above and upload it to Python. Enjoy your own Automated Sprinkler System.
How To Add MFA Security Through Your Raspberry Pi TerminalHow To Sync Lights In Your House To The Weather Outside?Creating a Web Based Weather Station Using ESP32Fix: Weather App not Working / Crashing In Windows 10