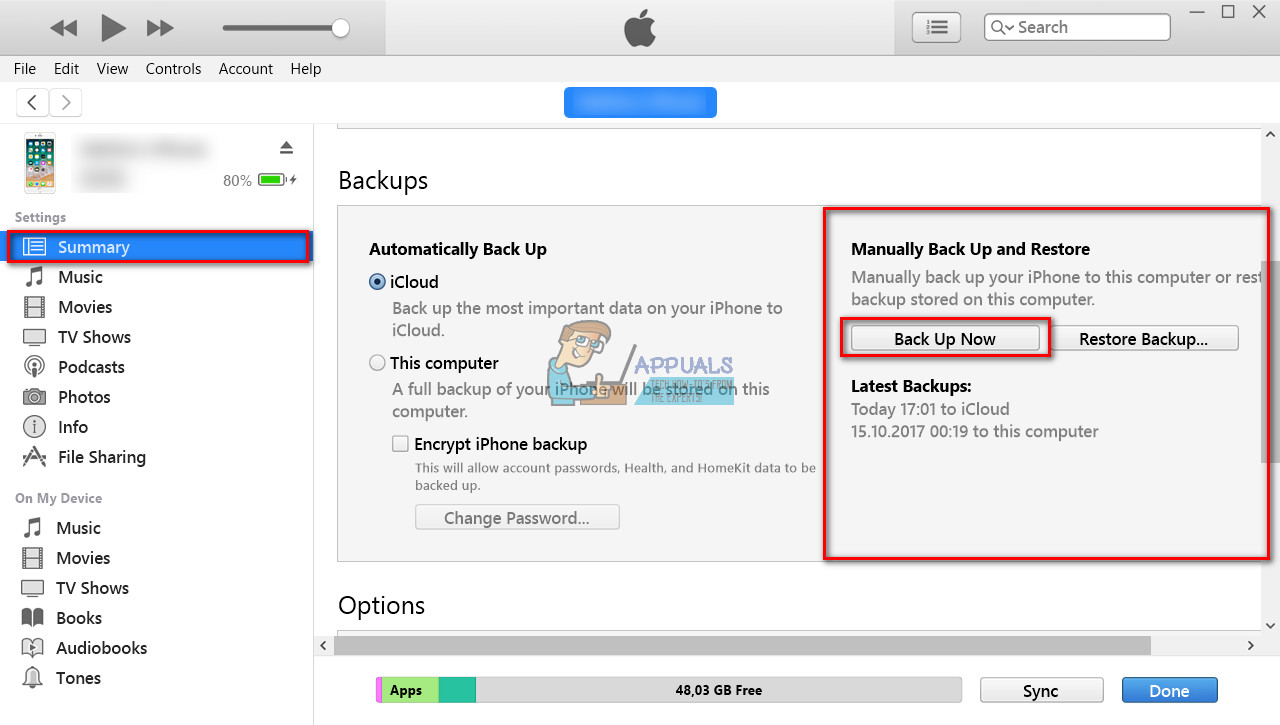
However, if you want to backup your iDevice for the first time using iTunes, follow the steps in next section.
Before You Start
Make sure you have the latest iTunes installed on your computer. Note: The latest version of iTunes requires Windows 7 or later or Mac OS X 10.9.5 or later. If you have an older OS version, you will need to update it first.
Steps to Backup Your iPhone on iTunes for the First Time
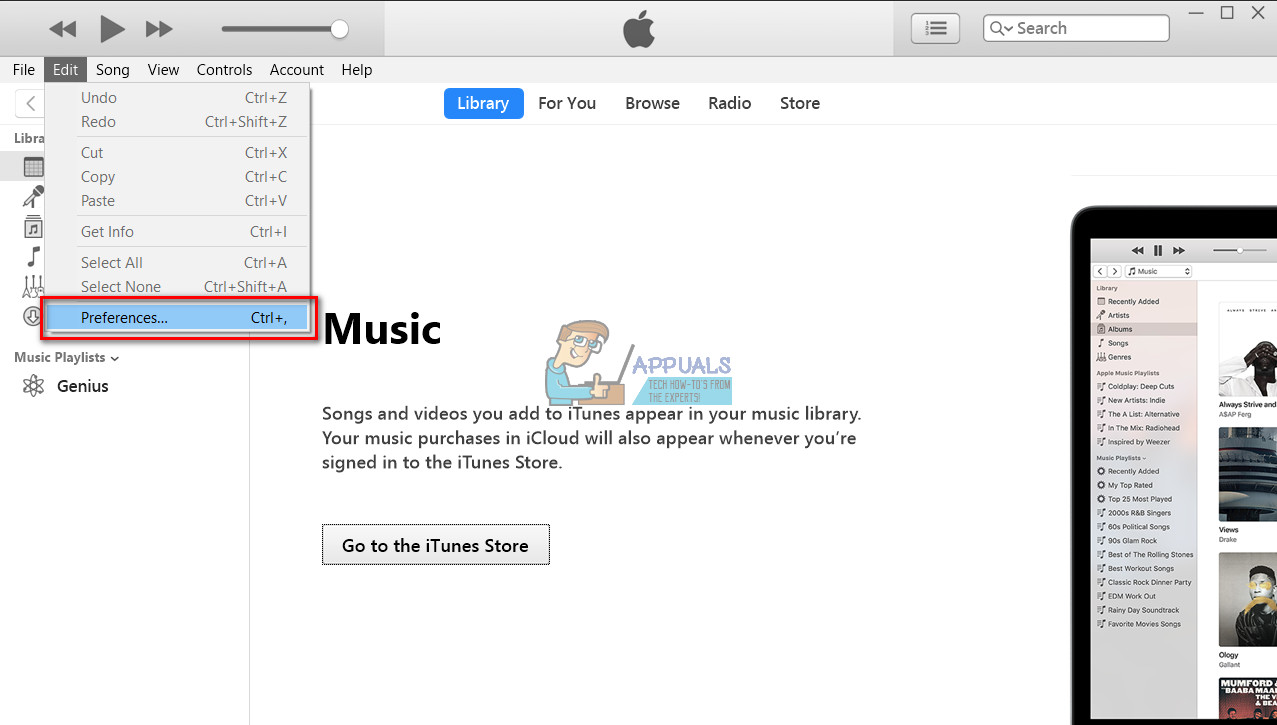
Step# 1: Before connecting your iPhone to the computer, launch iTunes, go to Preferences, and Turn off automatic device synchronization. That will prevent the computer from overwriting your iDevice’s storage.
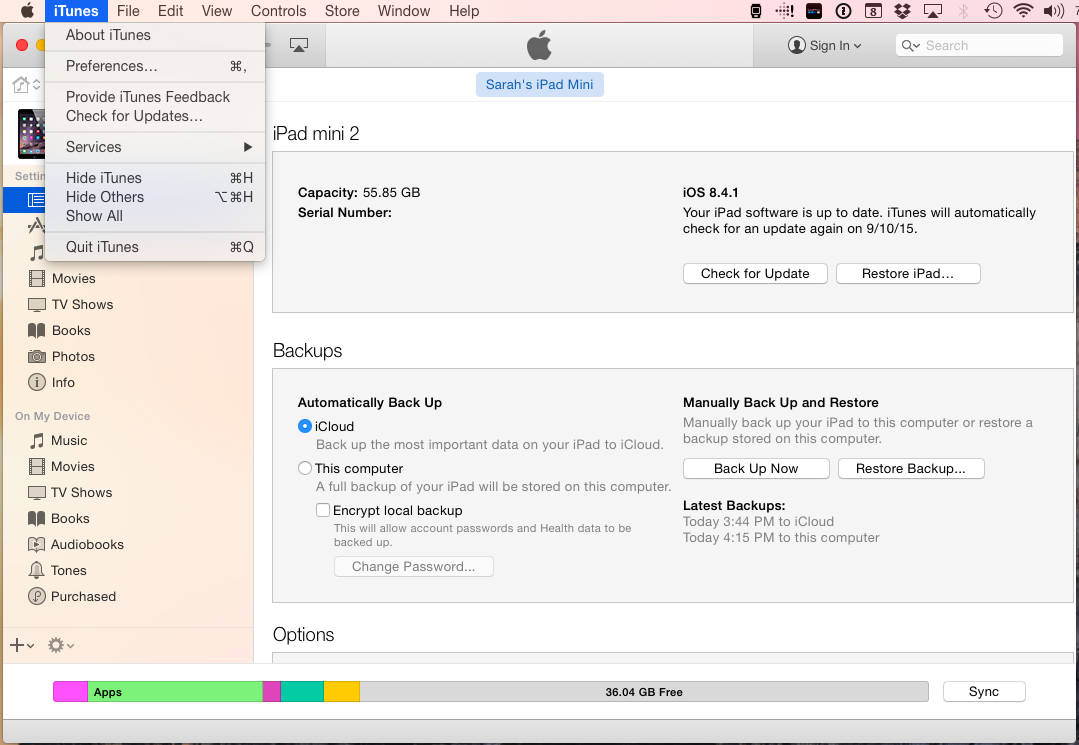
Windows: Click on Edit on the menu bar at the top of iTunes and choose Preferences. Mac: Click on iTunes on the Mac menu bar and select Preferences.
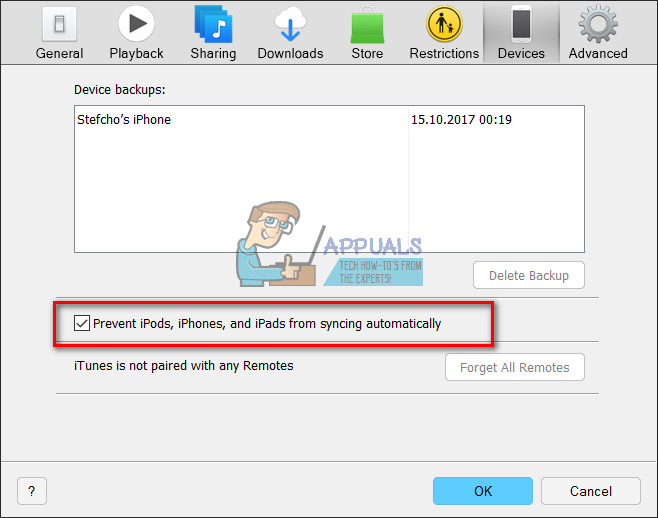
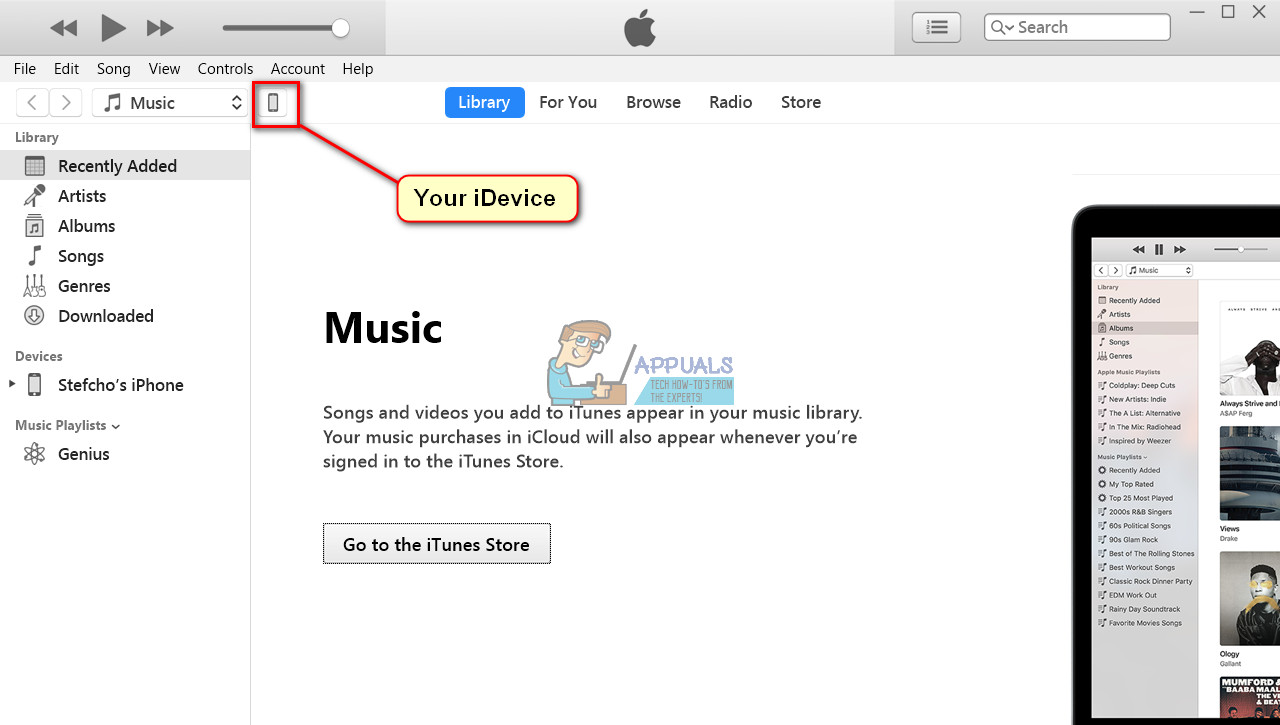
Now, open the Devices tab and check the box Prevent iPods, iPhones, and iPads from syncing automatically. Step #2: Once you finished the iTunes setup, connect your iPhone (or iPad or iPod Touch) to your computer via the original lightning USB cable. Now your device should appear in iTunes. Note: If your iDevice doesn’t appear in iTunes, try using different USB ports (do not use USB hubs), and make sure you are using a certified USB lightning cable. Step #3: When your iDevice’s icon shows up in iTunes, click on it and select the Summary section on the sidebar. Step #4: In the Manually Backup and Restore section, click Back up now, and wait for the process to finishes. For those of you who want to back up your devices in future automatically, you can choose the type of backup you want. Here you can also turn on the option to encrypt your iDevice backups. Do you have any question about this procedure? Let us know in the comment section below.
Fix: iTunes could not backup iPhone Because the iPhone DisconnectedHow to Backup your Server using Solarwinds Backup?How to Stop iTunes from Opening Automatically When Your iPhone Is Connected to…Fix: “iTunes could not restore the iPhone or iPad due to corrupt or…
