Fortunately, you can still create a bootable Windows 11 USB drive installer from macOS, but you need to either go through some 3rd party software or you’ll need to do some terminal work. But before we get to the actual methods, you should start by ensuring that the target PC is equipped to meet the minimum requirements to support Windows 11.
Requirements for Upgrading to Windows 11
1 GHz or faster CPU with a 64-bit dual-core or multi-core processor.4 GB of RAM and at least 65 GB storage on your system’s disk (we recommend at least 150 GB)PC must be equipped with UEFI boot mode support, TPM 2.0, DirectX 13, and WDDM 2.0 driver.The connected display must be high-definition (at least 720P) with a diagonal line larger than 8 inches and a color channel of 8 bits.
Now that you are familiar with the requirements, let’s go over the various methods that will allow you to create a Bootable Windows 11 USB on macOS: In what follows, we will go through every method described above. If you want to do this with as little 3rd party interference as possible go for option 1. On the other hand, if you’re looking for an approach as hassle-free as possible, go for option 2 and option 3.
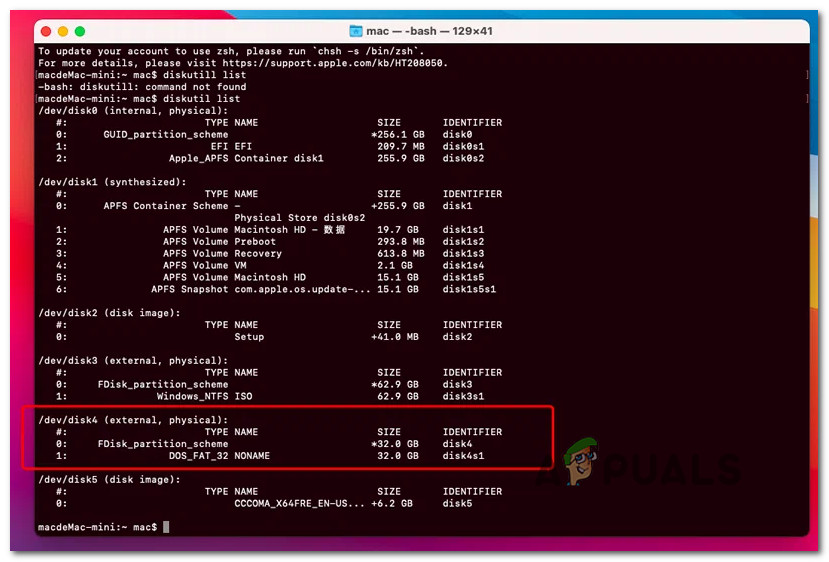
Create a Bootable Windows 11 USB via the Terminal App
First things first, don’t even think of using Boot Camp or a similar approach to get this done. This solution is geared towards dual booting, which is not what we need in our particular scenario. The better approach is to create a Windows 11 bootable USB using the Terminal app. All the steps outlined below are native (for the most part), with the exception of utilizing a third-party tool called wimlib. But before proceeding, make sure you meet the following requirements:
A Windows 11 ISO image file. You can follow the instructions here to get the latest version.A Mac computer running macOS. You’ll need version 10.12, 11, or later.A USB drive with 16 GB of storage or more.
Once you’ve made sure that you meet every requirement, follow the instructions below to create a Windows 11 Bootable USB from an existing iso on macOS using the Terminal app:
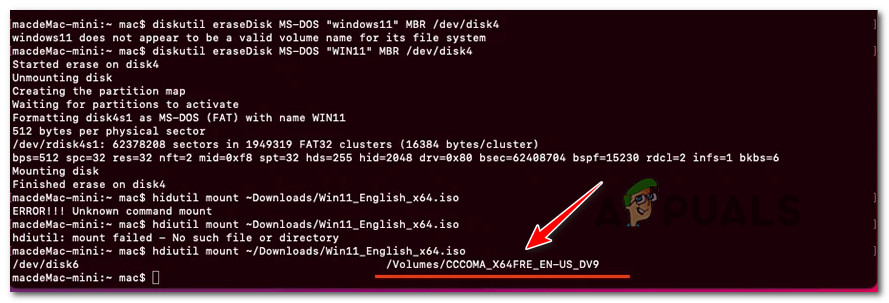
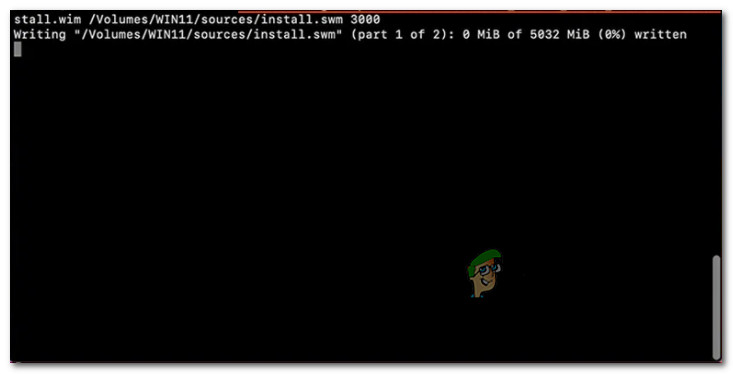
Getting around the file size restriction
It’s important to note that if you ignore the fact that install.wim is over 4 GB, you will definitely receive the “File too large” error message. This is because FAT32 is a file system that won’t support the handling of files larger than 4 GB (and install.wim exceeds that threshold). Fortunately, this is not a problem as you can easily use the wimlib tool to split the larger file into 2 pieces in order to complete the moving operation. For step by step instructions on how to do this, follow the instructions below:
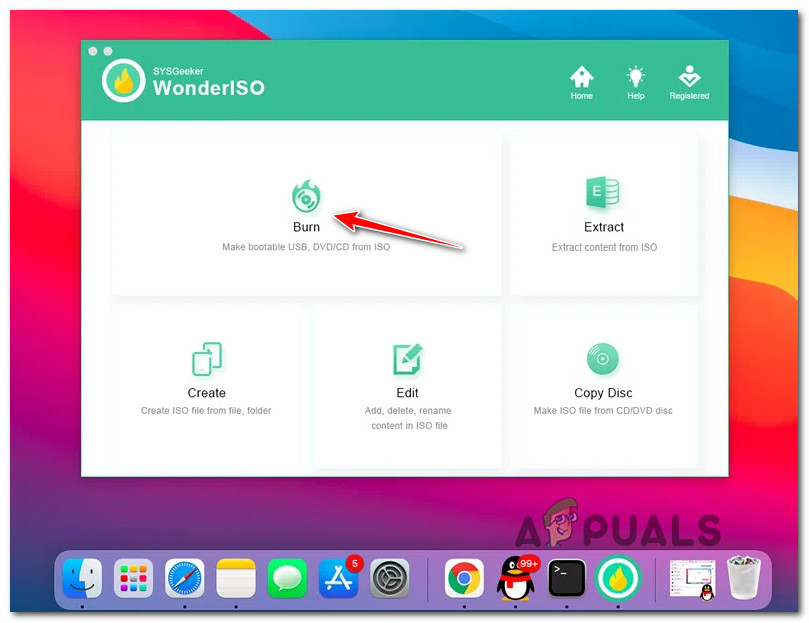
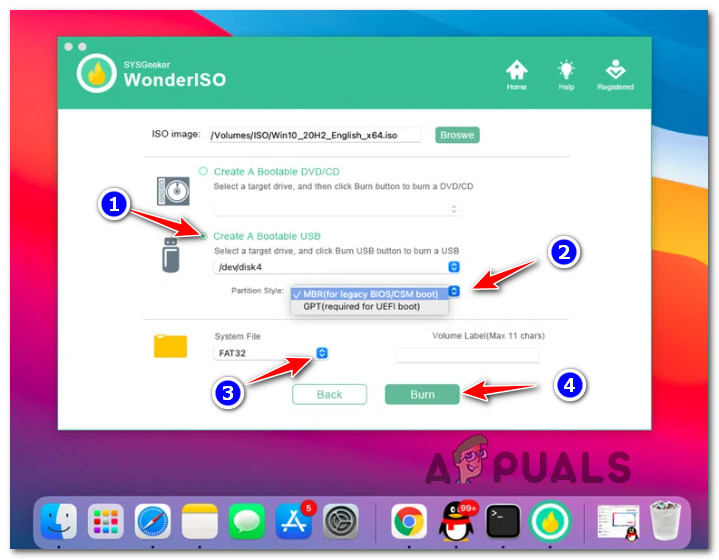
Create a Bootable Windows 11 USB via WonderISO
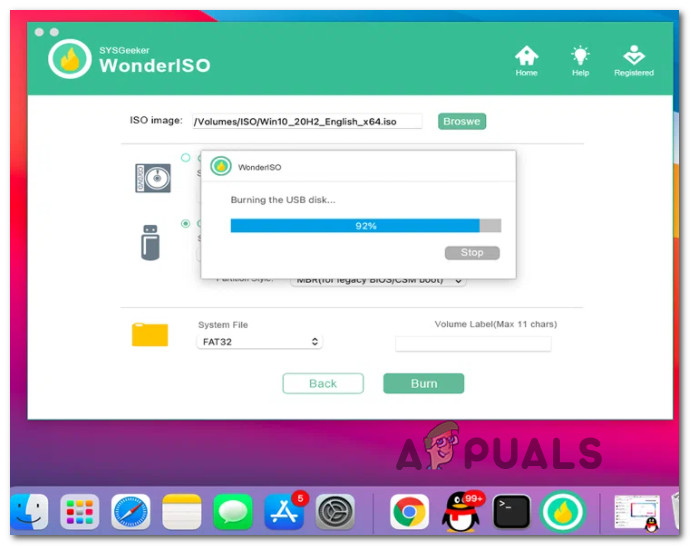
If the method above seemed too advanced for your competence, don’t worry. You can always use a 3rd party tool that features a simple GUI (WonderISO) to create the Windows 11 Bootable USB installer. Note: You can use WonderISO to create MBR and UEFI boot options for different computers. But the prime benefit of using WonderISO is the fact that this tool is capable of automatically splitting the install.wim file into two small pieces automatically. So you don’t have to do it yourself as we did above using the winlib tool. But before you get too excited, go to the requirements below and make sure you have what you need to g through with this method:
Windows 11 ISO file. Follow these steps to download the latest version available.Mac computer that supports macOS version 10.12, 11 or later.A USB flash drive with at least 16 GB of storageThe Mac version of WonderISO.
Once you’ve ensured that every requirement is met, follow the instructions below for step-by-step instructions on using WonderISO to create a bootable USB drive for Windows 11 on macOS: If you’re looking for a different approach, move down to the next potential fix below.
Create a Bootable Windows 11 USB via Deepin Boot Maker
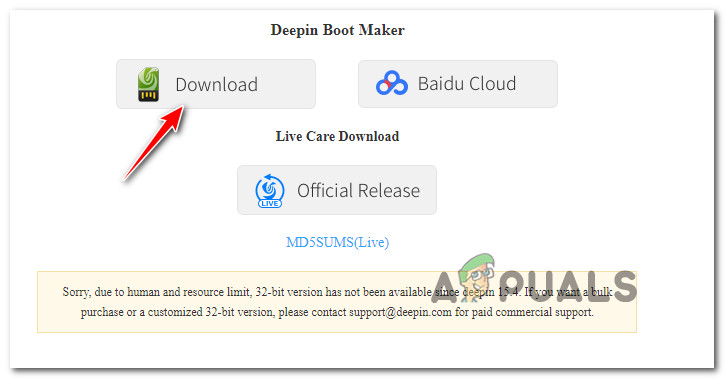
If you’re looking for the simplest option of the bunch, then definitely go with the Deepin Boot Maker tool. This is an open-source application that will allow you to make a Windows 11 bootable USB from an ISO image with minimal hassle. However, there are some problems with it. Even though it borrows a lot from the functionality found in RUFUS and features a very simple interface, the success rate for ISO creation is currently less than 40% if you’re on the latest macOS version available. And just like with the other methods, there are certain requirements that you need to be aware of before going this route:
Windows 11 ISO image file. Follow this article to get the latest version.A USB drive with at least 16 GB of storage.The latest version of Deepin Boot Maker. macOS version 11 or older. Big Sur (or older) is not supported.
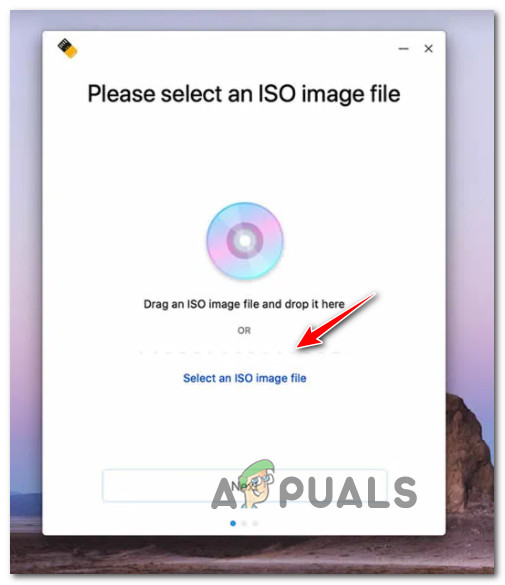
If you don’t mind using a tool that is error-prone and you have time for some experimentation, follow the instructions below to create a bootable Windows 11 USB using Deepin Boot Maker on Mac:
How to: Create an Ubuntu Bootable USB on Mac, Windows or UbuntuHow to Create Windows 7 Bootable DVD or USBHow to Create Windows 11 Bootable USB Installation MediaHow to Create Windows 10 Bootable USB Using Rufus