External screens would not work until they have been properly connected to the Surface. There are different types of connections Surface offers and external monitors with either of these can be connected to it. Here are the three types of connections available in Surface: HDMI: If your screen contains an HDMI port, you will need and HDMI cable to connect it to Surface. Along with that, you will need HDMI to Mini DisplayPort Cable and one Mini DisplayPort to HD AV Adapter. Both of these do not come along the Surface Pro 4. You will have to buy them separately. Wireless: If the screen you want to connect with your Surface is wireless, and uses Miracast, a Microsoft Wireless Display Adapter can be used to connect to it. This, again, is to be bought separately. You can also connect to any wireless display Windows identifies close by. Monitor/Projector: It is easier to connect to a projector or monitor that contains a DisplayPort. Get a DisplayPort to Mini DisplayPort cable and connect it simply. However, if it does not have an HDMI port or a DisplayPort, you will need a VGA cable. Also, you will need a Mini DisplayPort to VGA Adapter. NOTE: Please keep in mind that a VGA port is only for video. If you do not have external speakers attached to your Surface Pro 4, the sound will only be played from the tablet’s speakers.
Make connections according to the chosen method, and choose display options
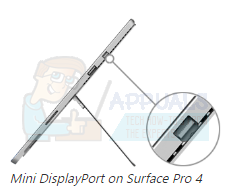
Once you are done selecting one of the methods mentioned above based on your device, choose the port and connect it to your device. Connect the opposite end to the Mini DisplayPort, Surface adapter or to the docking station, depending upon the method of connection. The Mini DisplayPort in Surface Pro 4 looks like this:
In case you are using an adapter, connect it to the Mini DisplayPort or the docking station. If you are connecting an external screen to your Surface wirelessly, swipe from the right side of your screen. After you select Connect after swiping, select the display you want to connect to from the list shown. Now that you are done with figuring out the type of connection and making a successful connection, you have a lot of options to choose from regarding how would you want to use your Surface and the external display. To view these options and select one, type Project to a second screen in the search bar present in taskbar. Select the result it gives you. The window that will open will give you four options:
PC Screen
If you want to see things on your Surface display only and not use the external display at all at that point in time, select this option. This will project only on your tablet’s screen.
Duplicate
As the name suggests, selecting this option will project on both the screens, that is, Surface’s own screen and the external display you connected.
Extend
This option allows you to use Surface’s display and the external display as one. It will project half image on one display and half on the other. Collectively, both the screens will give a complete view. This option is selected when users want to use multiple screens as one.
Second Screen Only
If you select Second Screen Only, the surface will only project on the external display and keep its screen blank.
Microsoft Lifts Windows 10 Version 1903 Upgrade Block On Surface Book 2 Devices,…Fix: Surface Pro 3 Stuck on Surface ScreenHow to Fix Mac Black Screen on Wake After SleepMicrosoft’s Surface Pro 8 and Surface Laptop 4 Latest Images Leak Online…