Installing and using Minecraft Mods is not beginner-level stuff, which is why most Minecraft players are not aware of how they can install Mods. Well, if you want to install and use a Minecraft Mod, here’s how you can do it:
Step 1: Make backups of your worlds
In case anything goes wrong, you should always have a backup plan – this is why the first step you need to perform is to make backups of your worlds as they are. To do so, you need to: Open your File Explorer. Type %appdata% into the directory field at the top of the window and press Enter. Navigate to the following directory: In this folder, you will see a number of different folders depending on how many worlds you have in the game. Copy all of these folders and paste them in a secure location. If anything goes wrong during the Mod installation process and any of your worlds become corrupt, all you have to do is simply copy these folders back to the directory stated above and a crisis will have been averted.
Step 2: Download and install Minecraft Forge
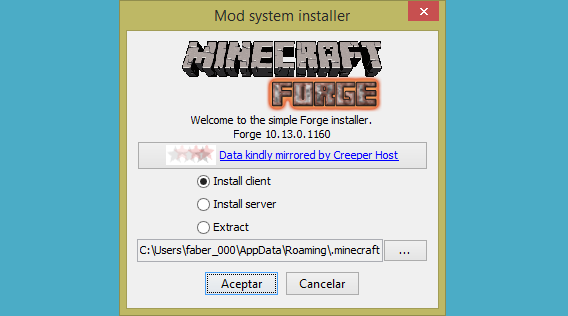
Seeing as though Minecraft does not offer an in-game option that you can use to install Mods, you are going to have to use an unofficial utility to do so. Out of the many unofficial utilities that can enable you to install and use Minecraft Mods, Minecraft Forge is undoubtedly the best. So, simply download an installer for the latest version of Minecraft Forge from here, launch the installer when it has been downloaded to begin the installation, leave the Install client option selected and click on OK/Accept/Acceptar. To make sure that Minecraft Forge has indeed been installed, launch Minecraft, set your profile to Forge and click on Play.
Step 3: Download the Mods and/or Resource Packages that you want to install
Next, you are going to have to download the Mods and/or Resource Packages that you want to install and use. Both Mods and Resource Packages are found in .RAR, .JAR and .ZIP formats and are available for download on a wide array of different websites. However, there are many virus-ridden Mods and Resource Packs out there, and the possibility of being scammed while trying to download one is not something to be gambled with, which is why it is recommended that you download Mods from trustworthy websites such as PlanetMinecraft and Resource Packs from websites like ResourcePack. Simply log onto a website you trust, search for the Mod you desire and download it.
Step 4: Move the downloaded Mods to the /mods/ folder
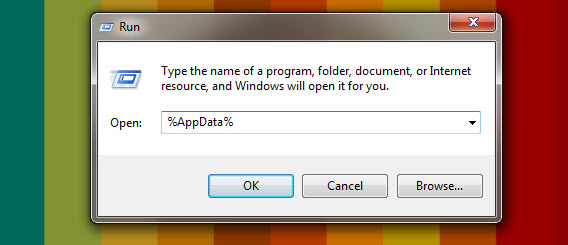
Once the Mod you want has been downloaded, you need to place it in the /mods/ folder in order for Minecraft Forge to be able to incorporate it into the game. To do so, you need to: Cut or copy the Mod’s .ZIP/.JAR/.RAR file. Press Windows Logo key + R to open a Run Type %AppData% into the Run dialog and press Enter.
Navigate to the following directory: Paste the file you copied earlier into this folder. The next time you run Minecraft, Minecraft Forge will detect this change and incorporate the Mod into the game.
Step 5: Play Minecraft and test out your new Mods
Once you have gone through all of the steps listed and described above, your Mod(s) will have been installed and ready for use – all you need to do is fire up Minecraft and test your new Mod(s) out in all its magnificent glory. Be sure to play Minecraft on the Forge profile!
How to install and use Resource Packs
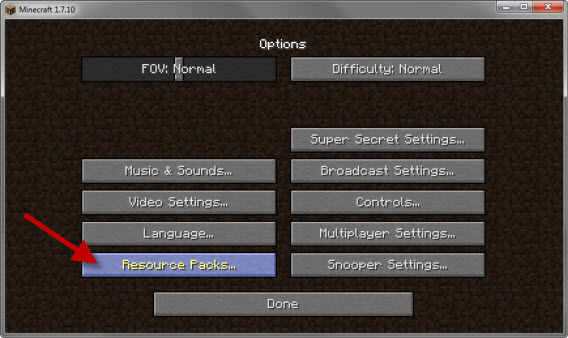
Unlike Mods, you can install and use Resource Packs directly through an in-game option provided in Minecraft. To install and use a Resource Pack, simply go to Options > Resource Packs…, browse to the Resource Pack you want to use and select it. Some Mods require specific Resource Packs to be installed and in use in order for them to work as they are intended to.
15 of The Best Mods for MinecraftFallout 3 Windows 10 Guide (Crash and Mods)Men Of War Assault Squad 2 ModsHow to Create a Flashable Zip for Android System Mods