How to enable or disable Windows Defender in Windows 7
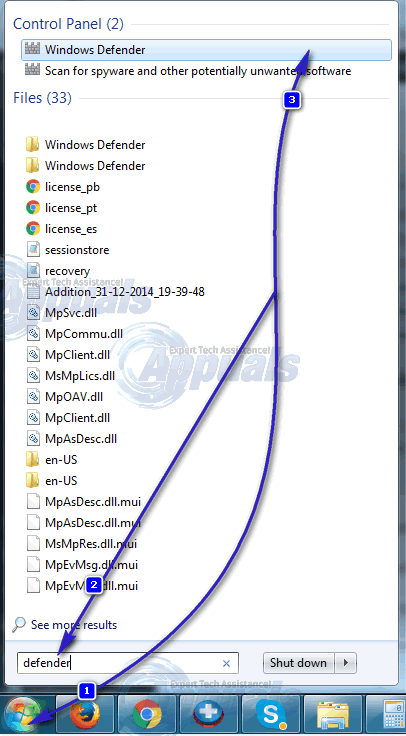
As compared to its successors, turning enabling or disabling Windows Defender on a computer running on Windows 7 is relatively easier. To enable or disable Windows Defender in Windows 7, you need to: Open the Start Menu. Type defender into the Search. Click on the search result titled Windows Defender.
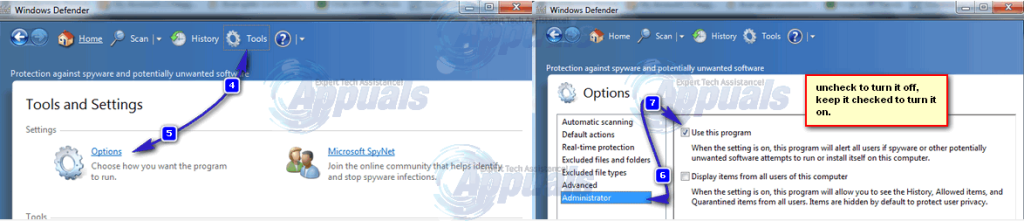
When Windows Defender opens up, click on Tools in the toolbar at the top of the window. Click on Options in the contextual menu. Click on Administrator in the left pane. If Windows Defender is enabled and you want to disable it, the box beside Use this program will be checked, so simply uncheck it by clicking on it and Windows Defender will be disabled. On the other hand, if Windows Defender is disabled and you want to enable it, the box beside Use this program will be unchecked, so simply check it by clicking on it and Windows Defender will be enabled. Click on Save. If you are prompted by a User Access Control dialog, confirm the action by entering your password or clicking on Yes.
How to enable or disable Windows Defender in Windows 8/8.1
To disable Windows Defender on a computer running on Windows 8 or 8.1, you need to: Open the Control Panel. Switch to Icons View. Click on Windows Defender. Navigate to the Settings Click on Administrator in the left pane. If Windows Defender is enabled, the box beside Turn on Windows Defender in the right pane will be checked. To disable Windows Defender, all you need to do is uncheck the box beside Turn on Windows Defender by clicking on it. Click on Save changes. If prompted by User Access Control, enter your password or click on Yes to confirm the action. Once the action has been confirmed, the changes will be saved and Windows Defender will be disabled. To enable Windows Defender in Windows 8 or 8.1, you need to: Click on the Action Center icon in your taskbar notification area (the waving flag icon). Click on either the Turn on spyware protection (Important) link or the Turn on virus protection (Important) As soon as you click on one of the two links listed above, Windows Defender will be enabled and you will be taken to its desktop app, which will be green and will say PC Status: Protected at the top.
How to enable or disable Windows Defender in Windows 10
Enabling and disabling Windows Defender in Windows 10 is relatively more complex as what you would have had to do on Windows 7, 8 or 8.1. How is that so? Well, to put it simply, if you disable Windows Defender in Windows 10 using the conventional “Start Menu” means, Windows will re-enable Windows Defender within a couple of days. If you want to disable Windows Defender permanently in Windows 10, you are going to have to put in some effort and tinker around with your computer’s Local Group Policy Editor. The following are the two solutions that you can use to enable (and/or disable) Windows Defender in Windows 10:
The temporary solution
Open the Start Menu. Click on Settings.
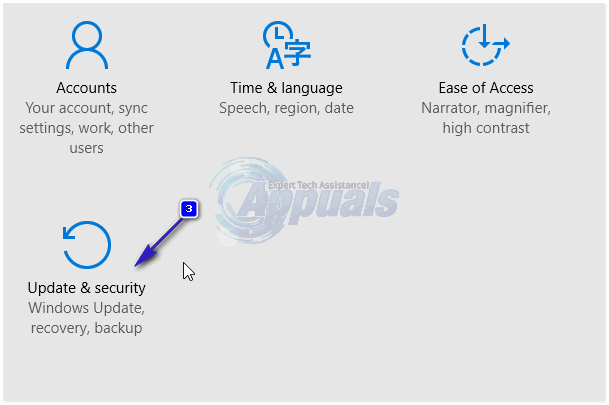
Click on Update & Security.
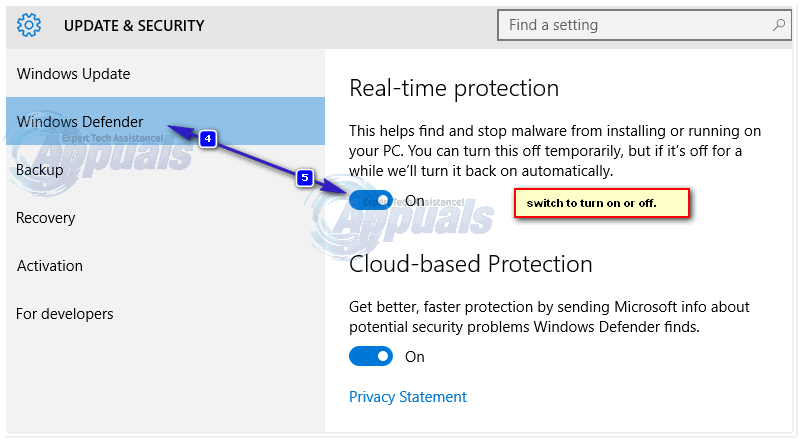
Click on Windows Defender in the left pane. To enable Windows Defender, turn Real-time protection on in the right pane. To disable Windows Defender, turn Real-time protection off. Disabling Windows Defender using this method will not last for long as Windows will re-enable Windows Defender in a couple of days.
The permanent solution
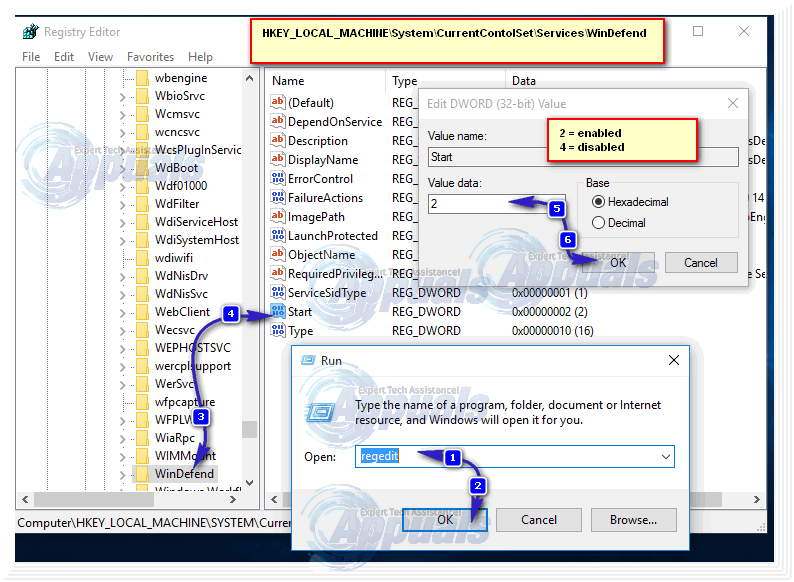
Press Windows Logo key + R to open a Run. Type regedit into the Run dialog and press Enter to open the Registry Editor. If prompted by UAC, confirm the action. Navigate to the following directory in the Registry Editor: Click on the WinDefend subkey in the left pane to display its contents in the right pane. Double-click on the Start value in the right pane to edit it. If Windows Defender is enabled and you want to disable it, replace whatever’s in the Start value’s Value Data field with 4 – this will disable the Windows Defender If Windows Defender is disabled and you want to enable it, replace whatever’s in the Start value’s Value Data with 2 – this will configure the Windows Defender service to start automatically. Click on OK. Close the Registry Editor and restart your computer. The changes will take effect when your computer boots up. If you choose to disable Windows Defender using this method, it will only be re-enabled if you re-enable its service manually.
Windows 10 Update KB4517211 Breaks Cortana Search Functionality, Turns Off…How to Fix Windows Defender Error ‘This app is turned off by group policy’Fix: Turn windows features on and off is blank or empty in Windows 11How to Turn Off Tiles in Windows 10